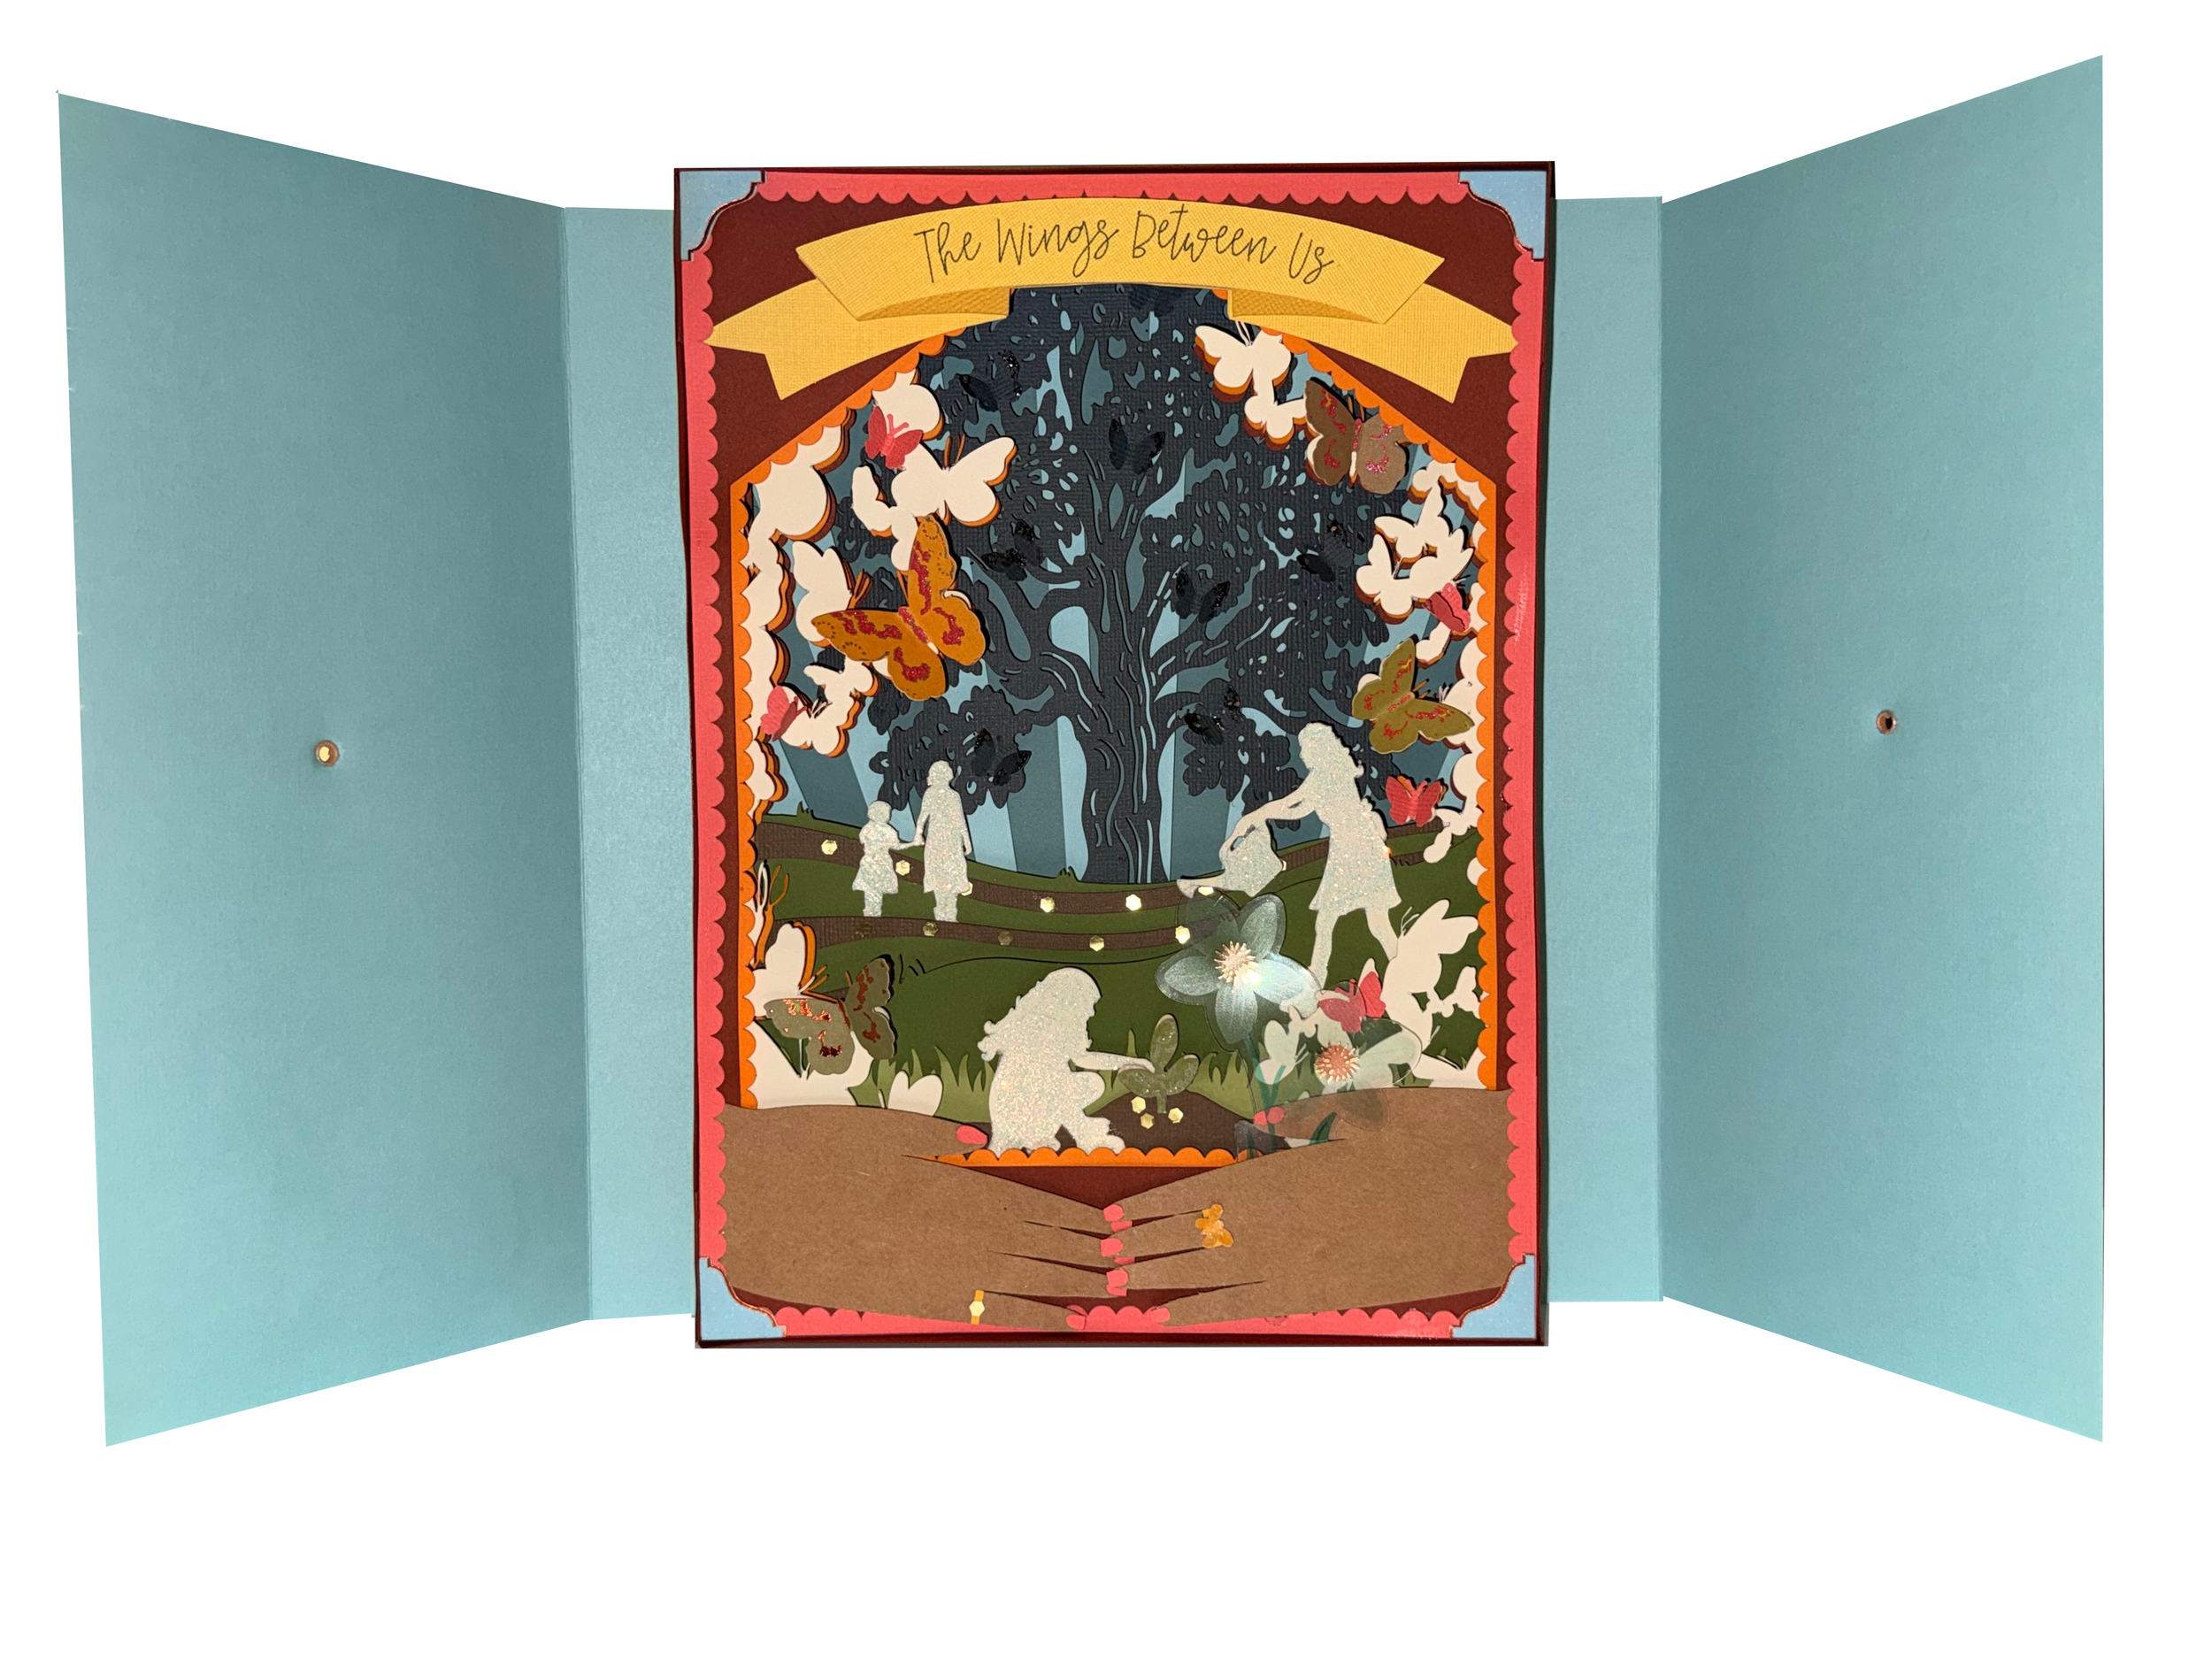
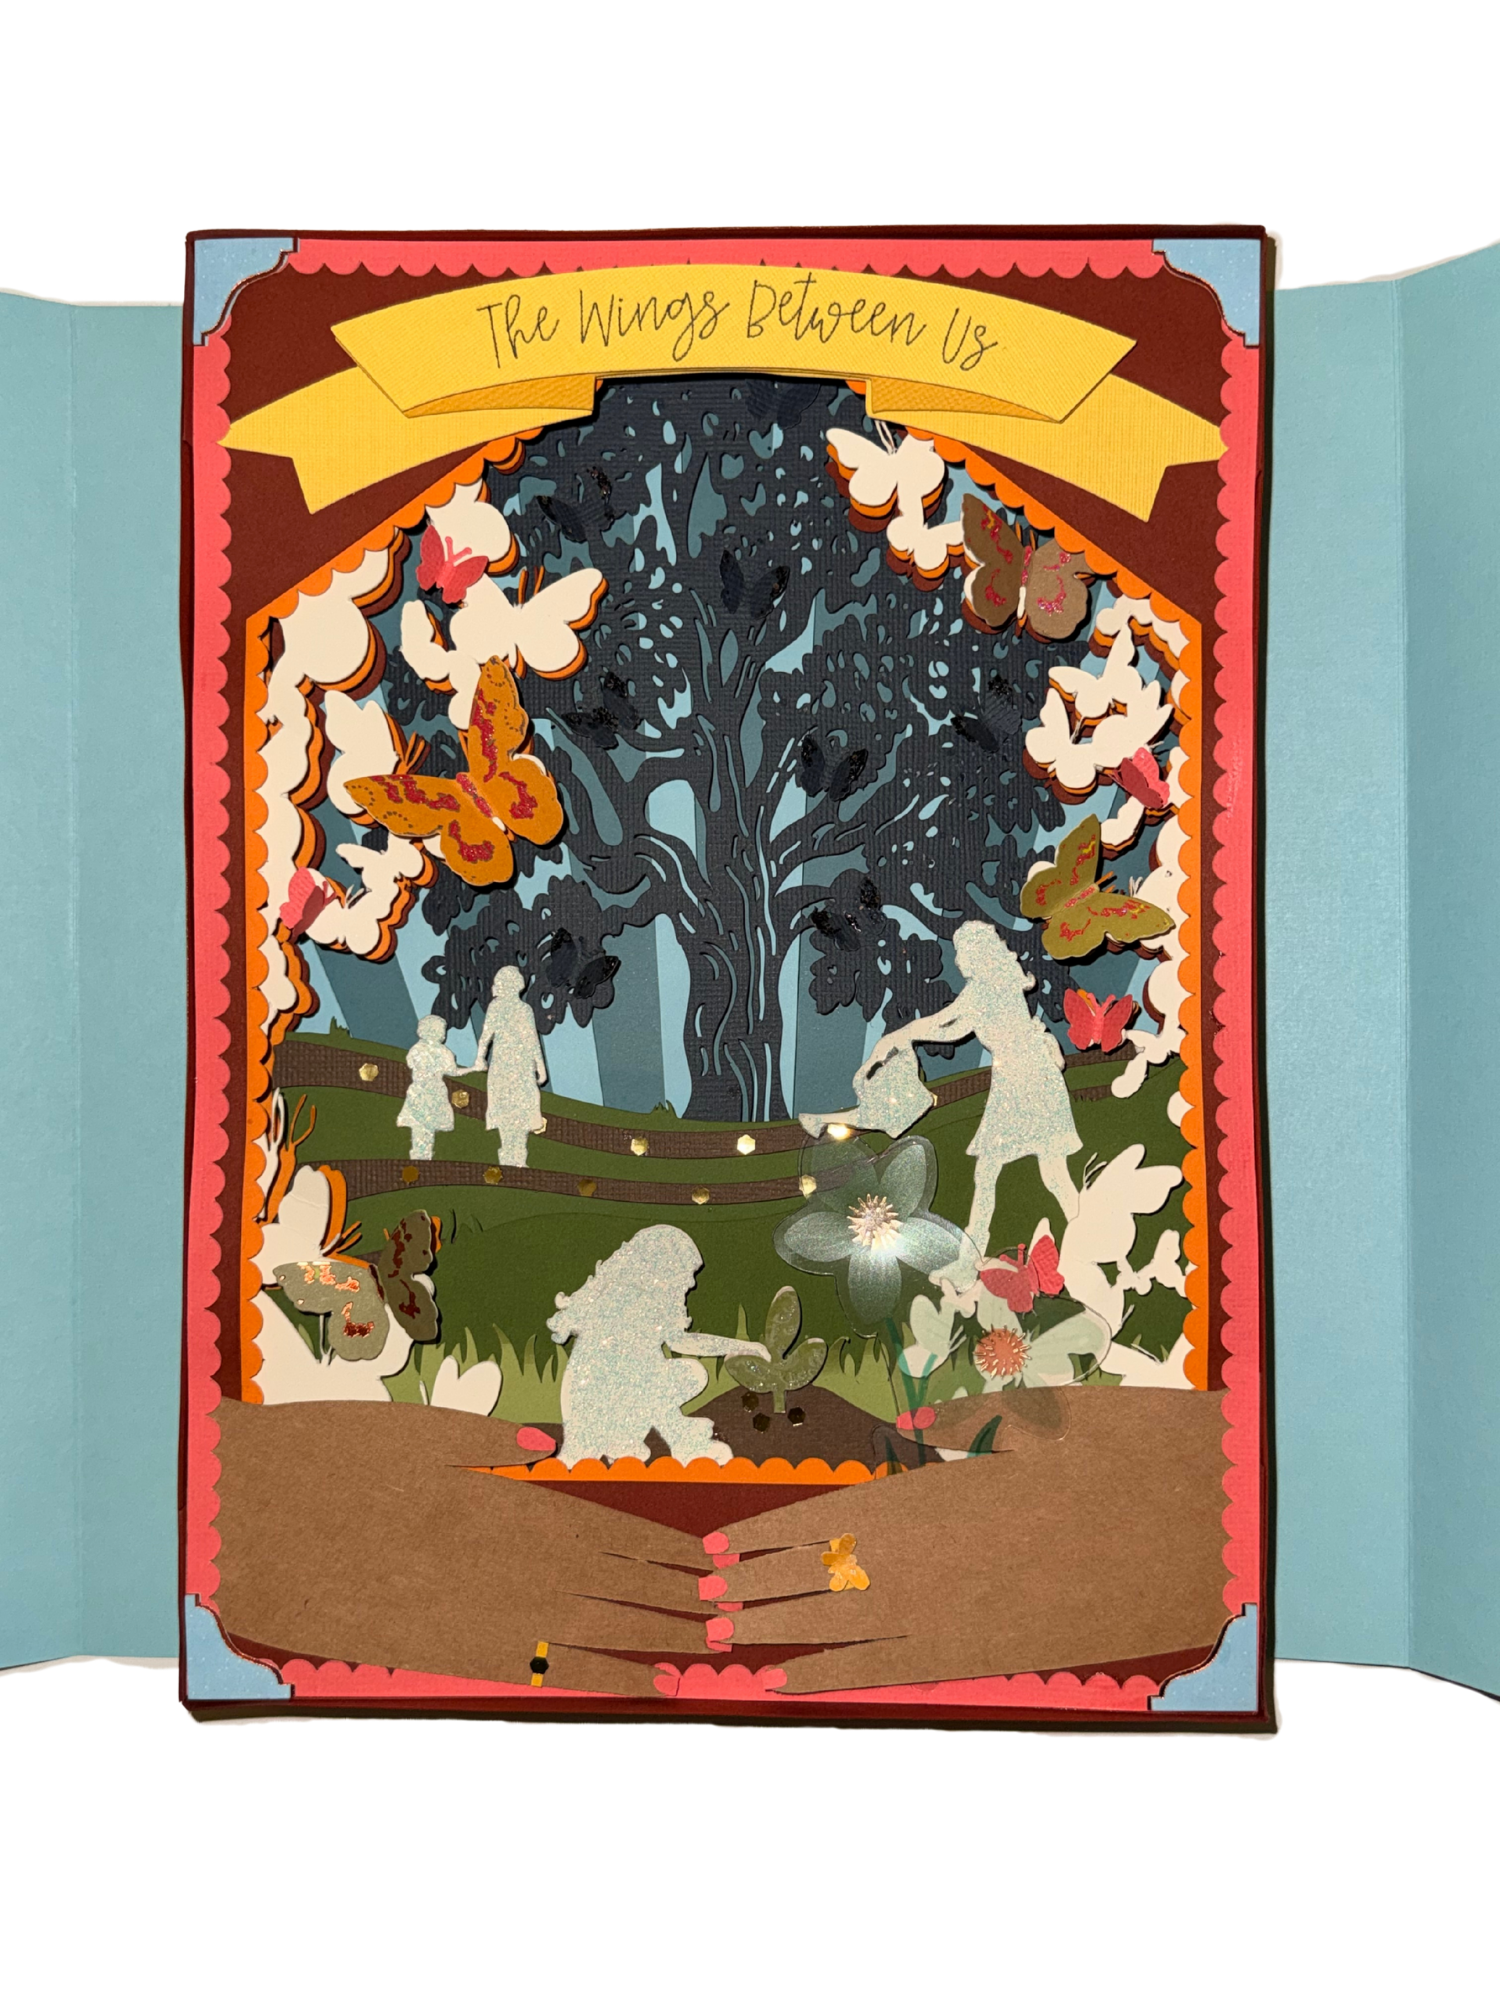
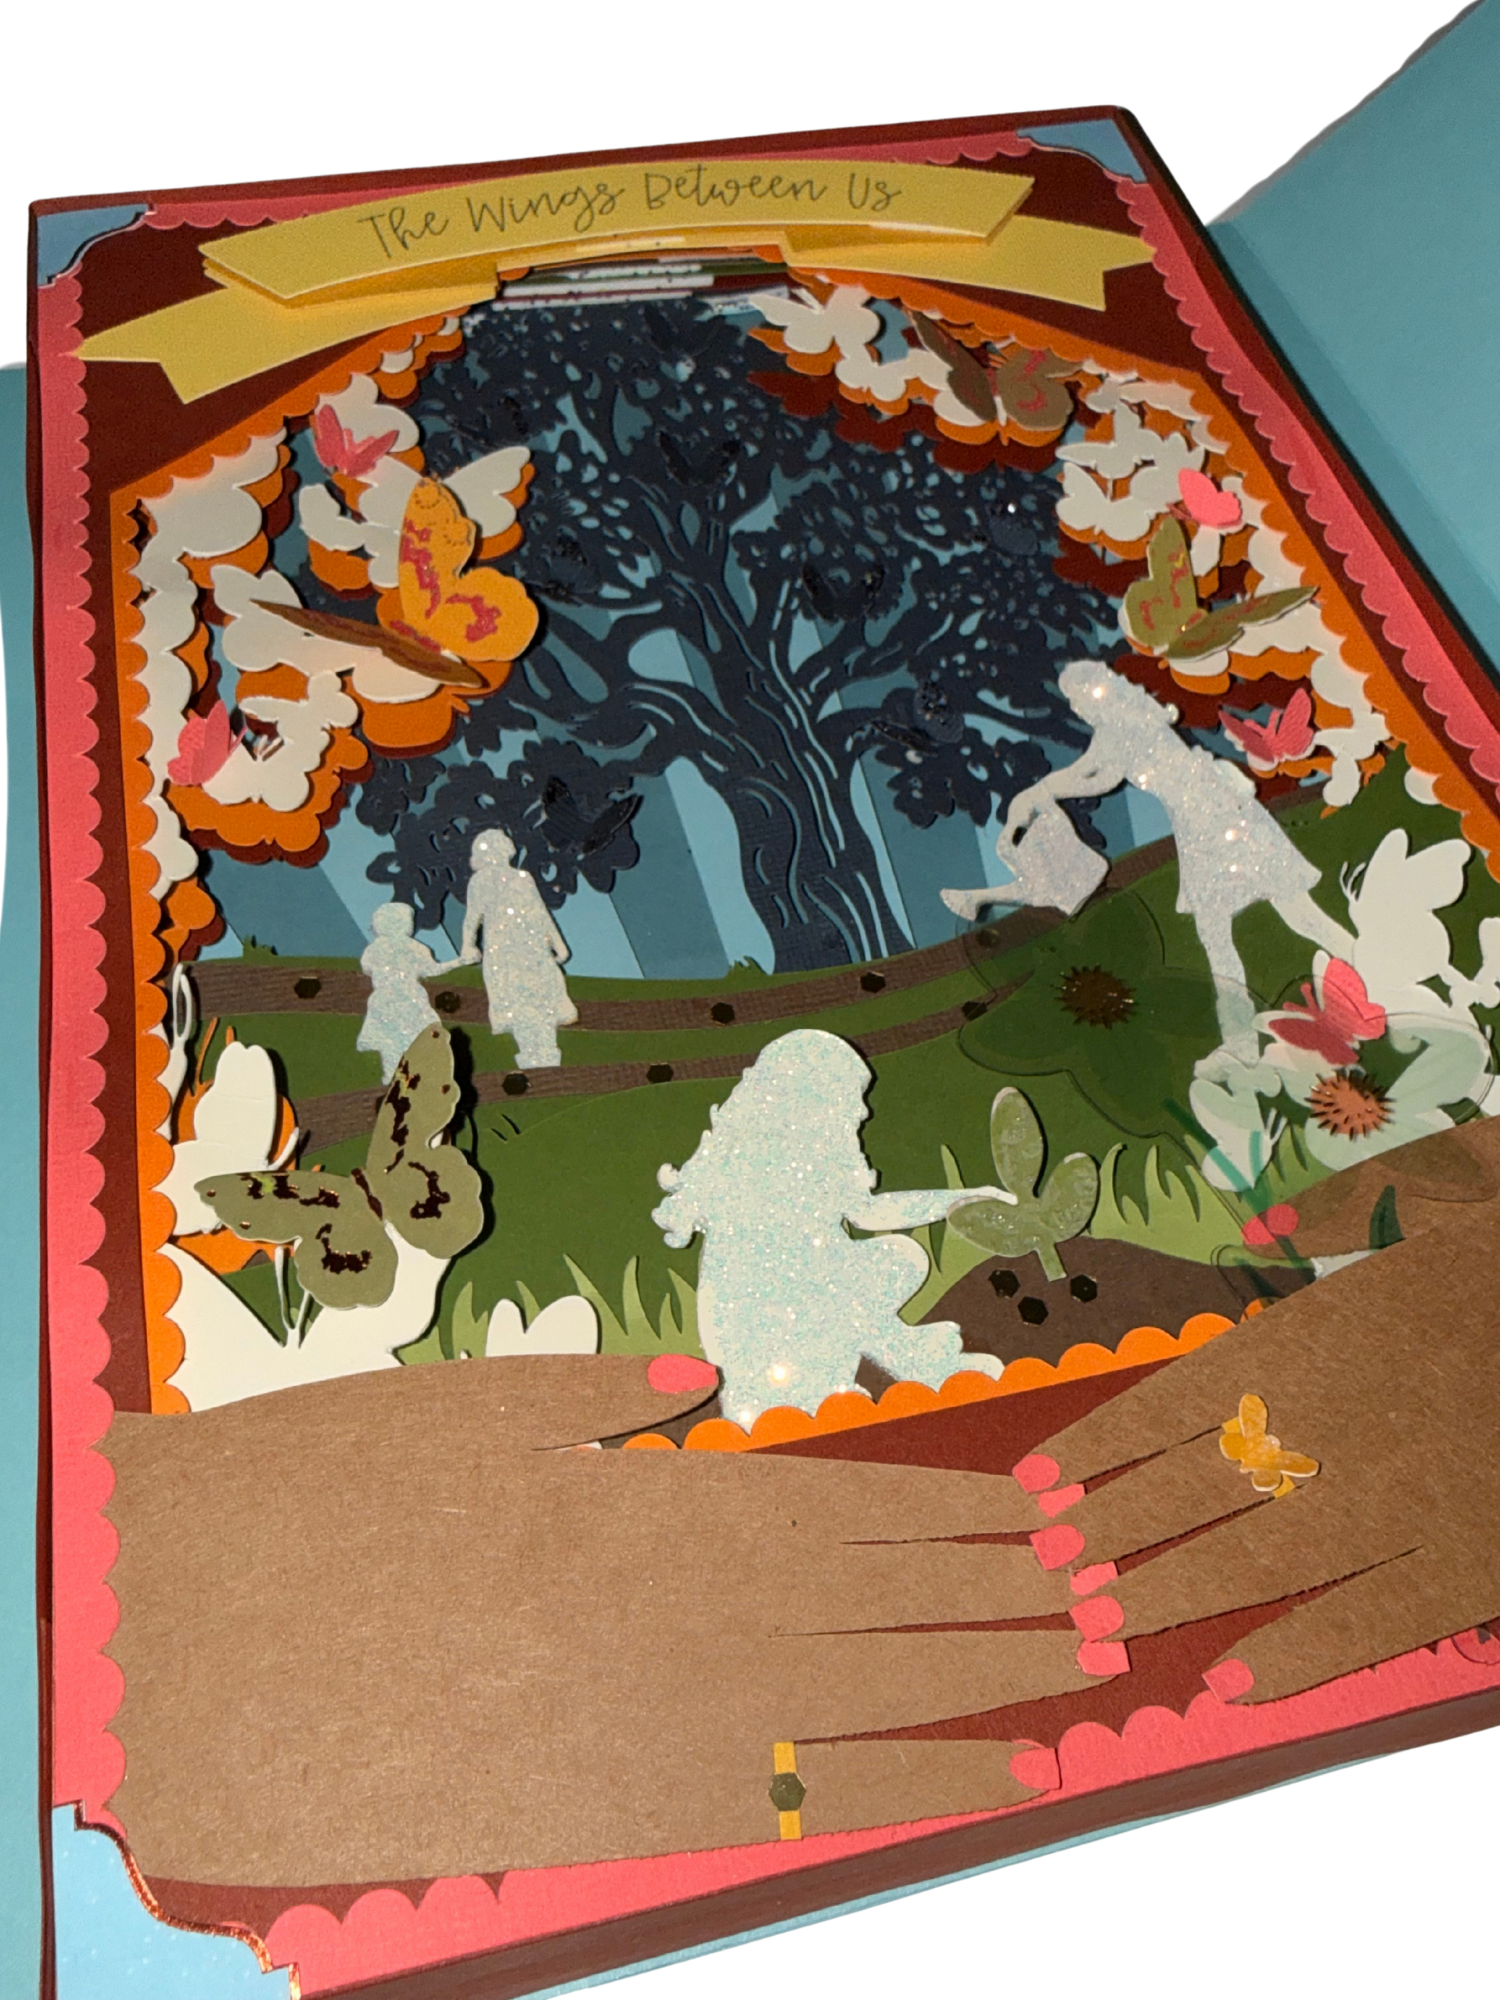
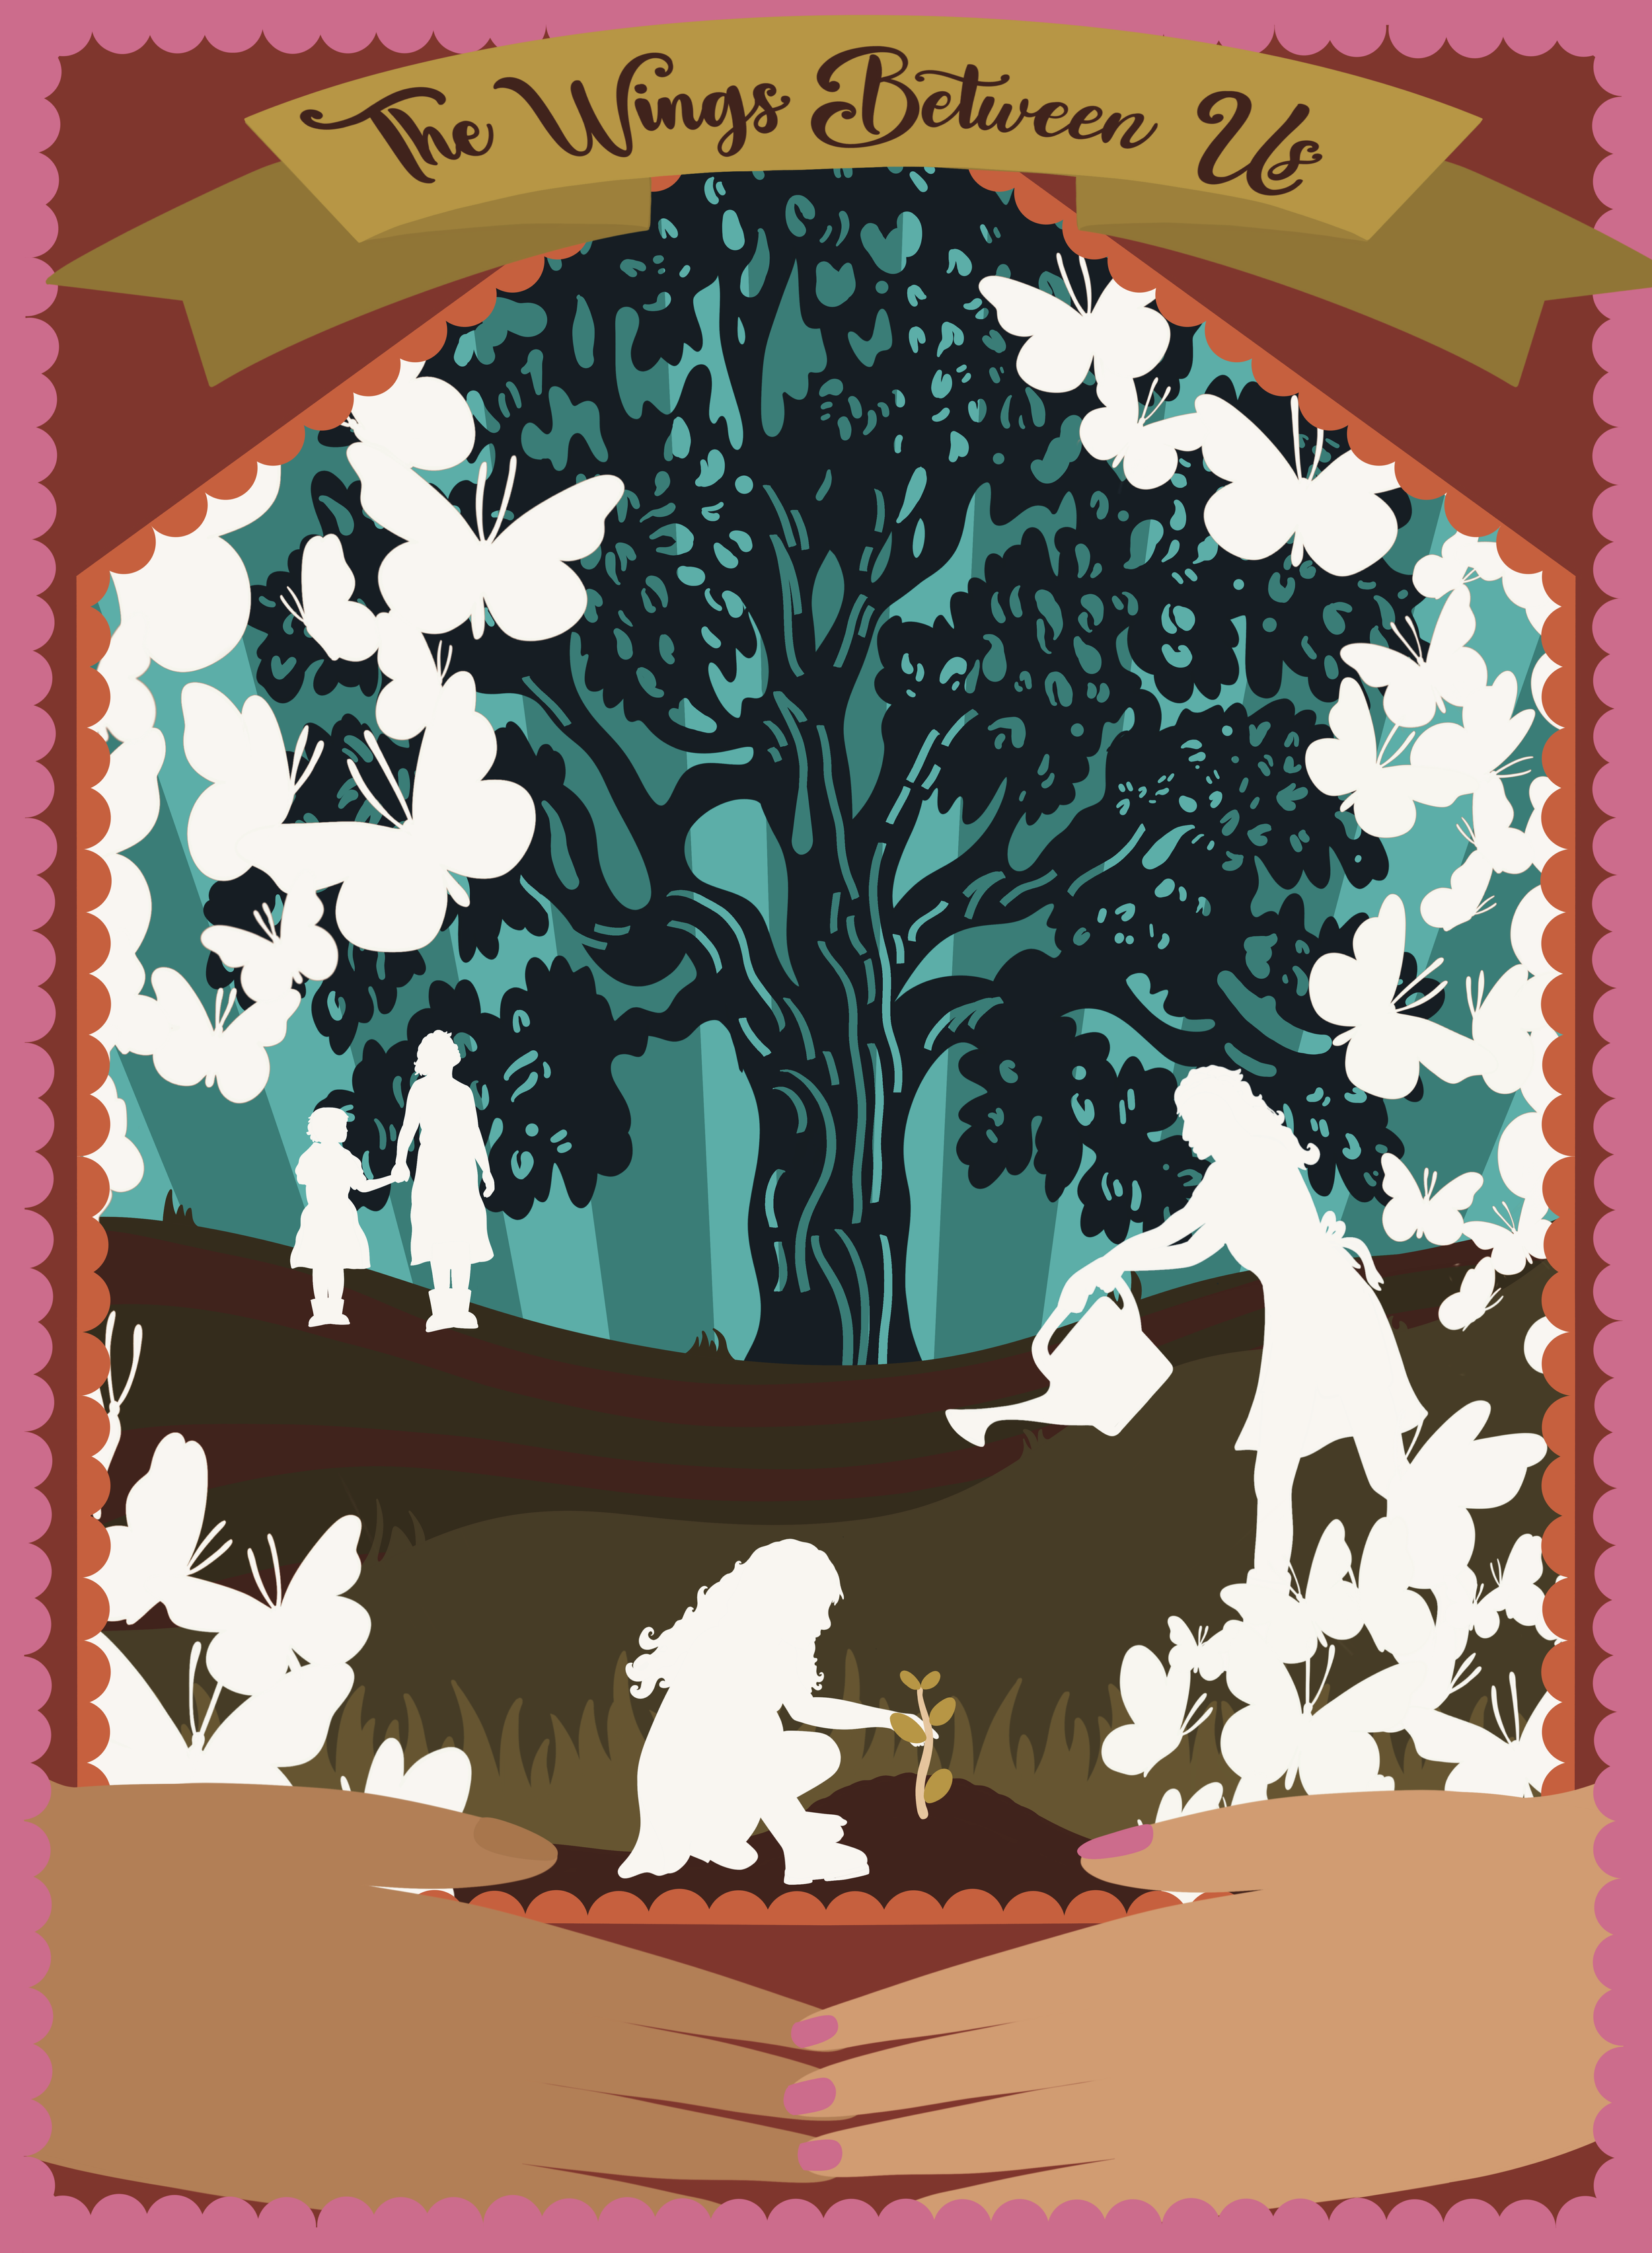
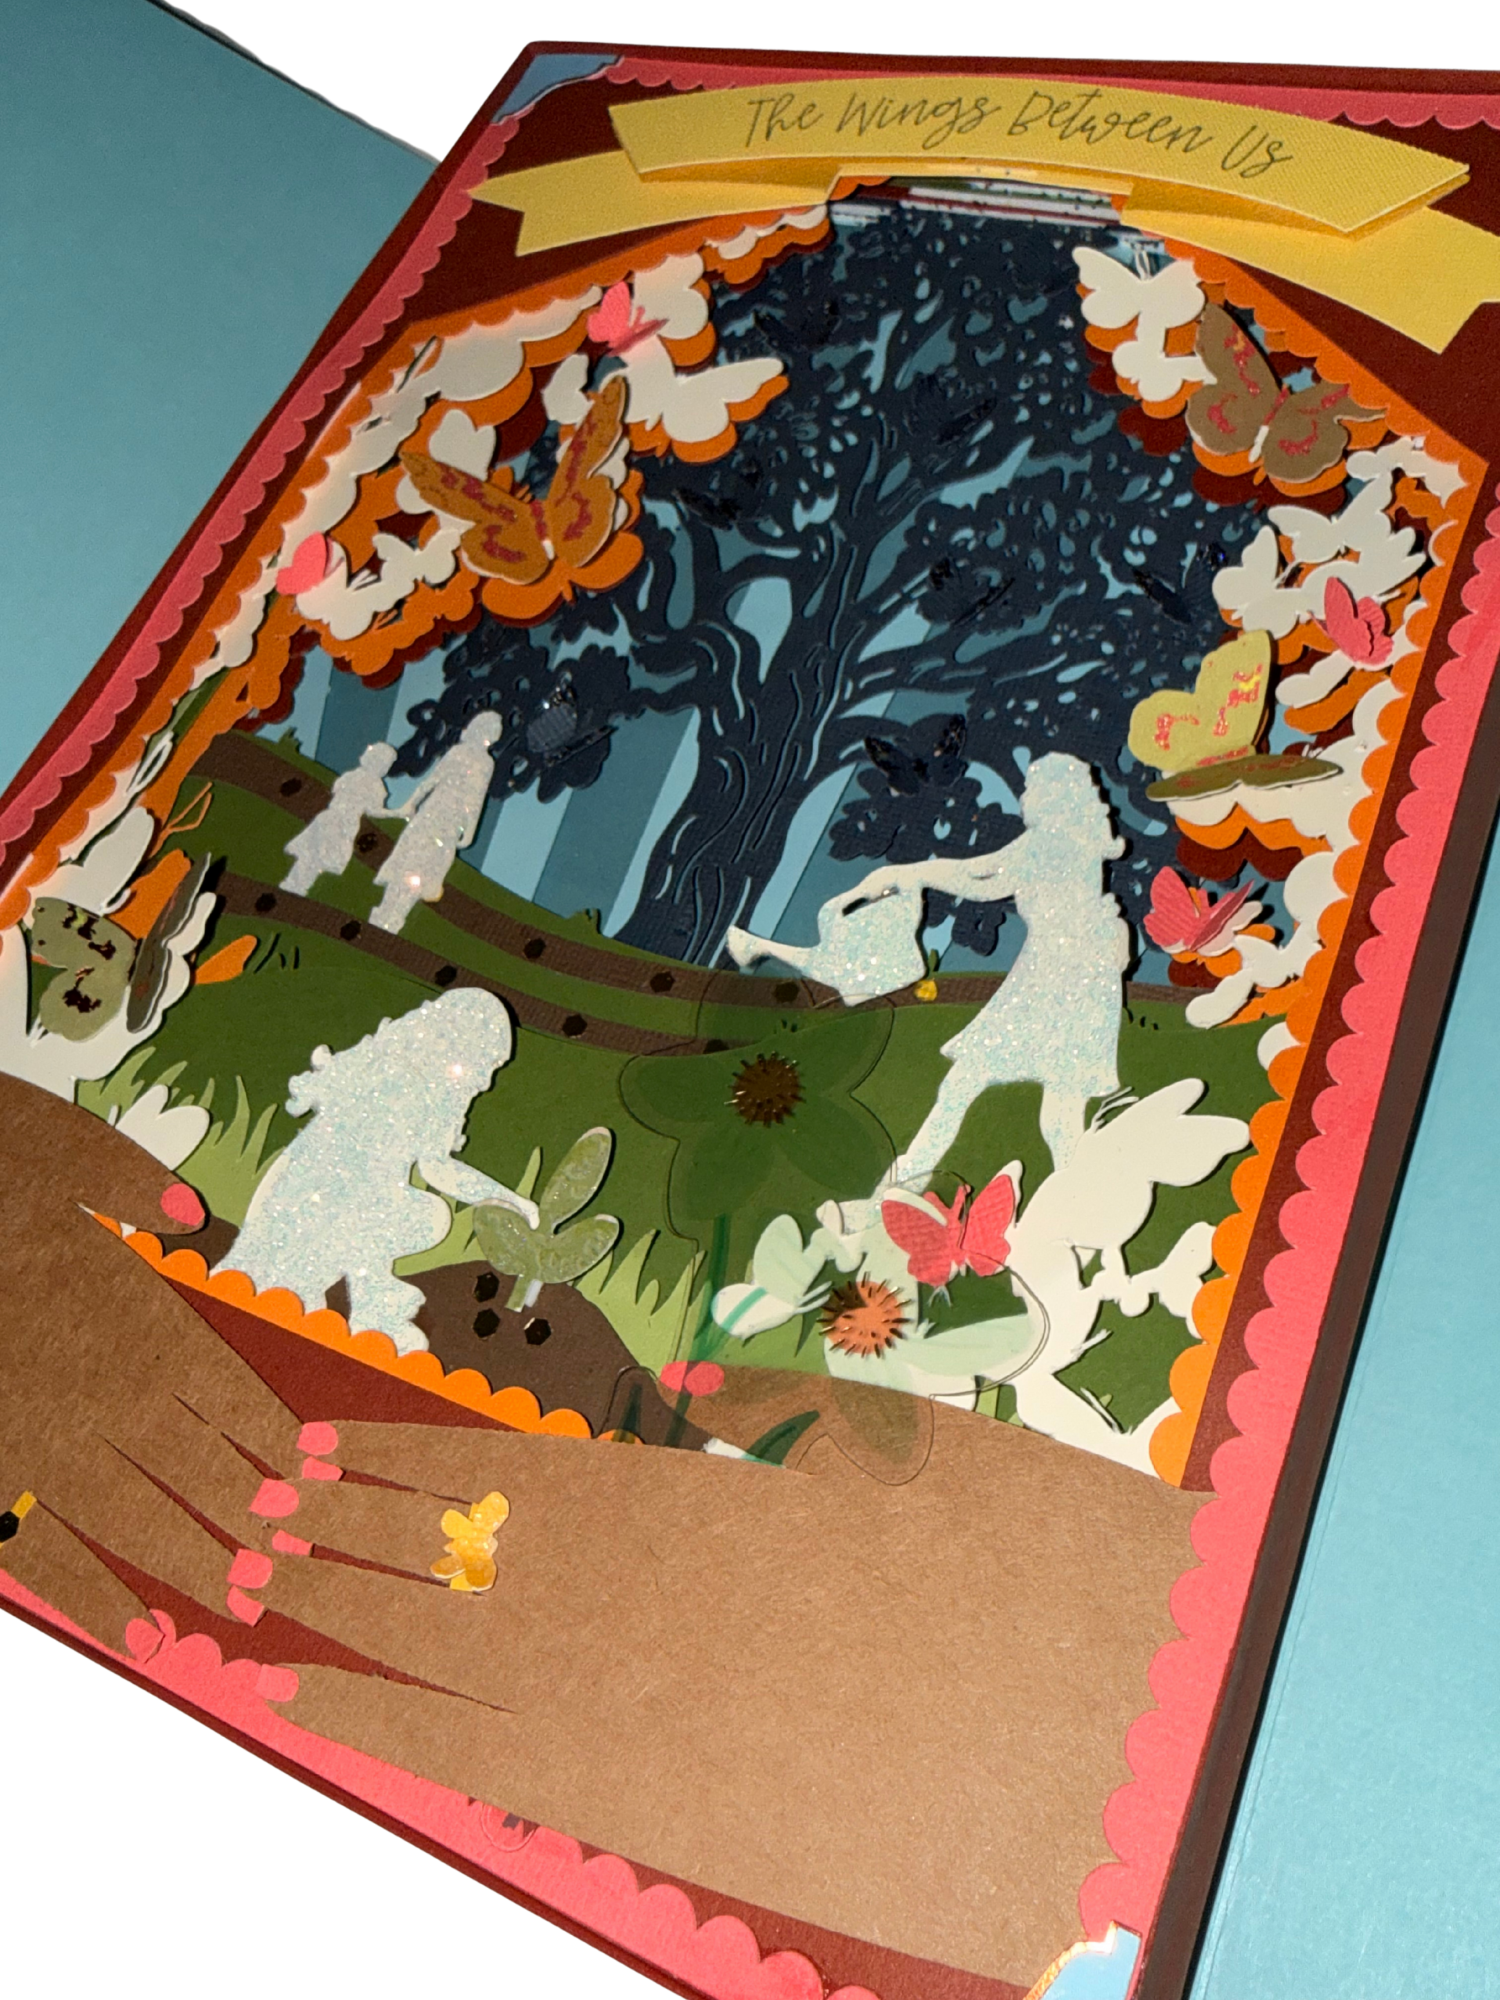
The Wings Between Us
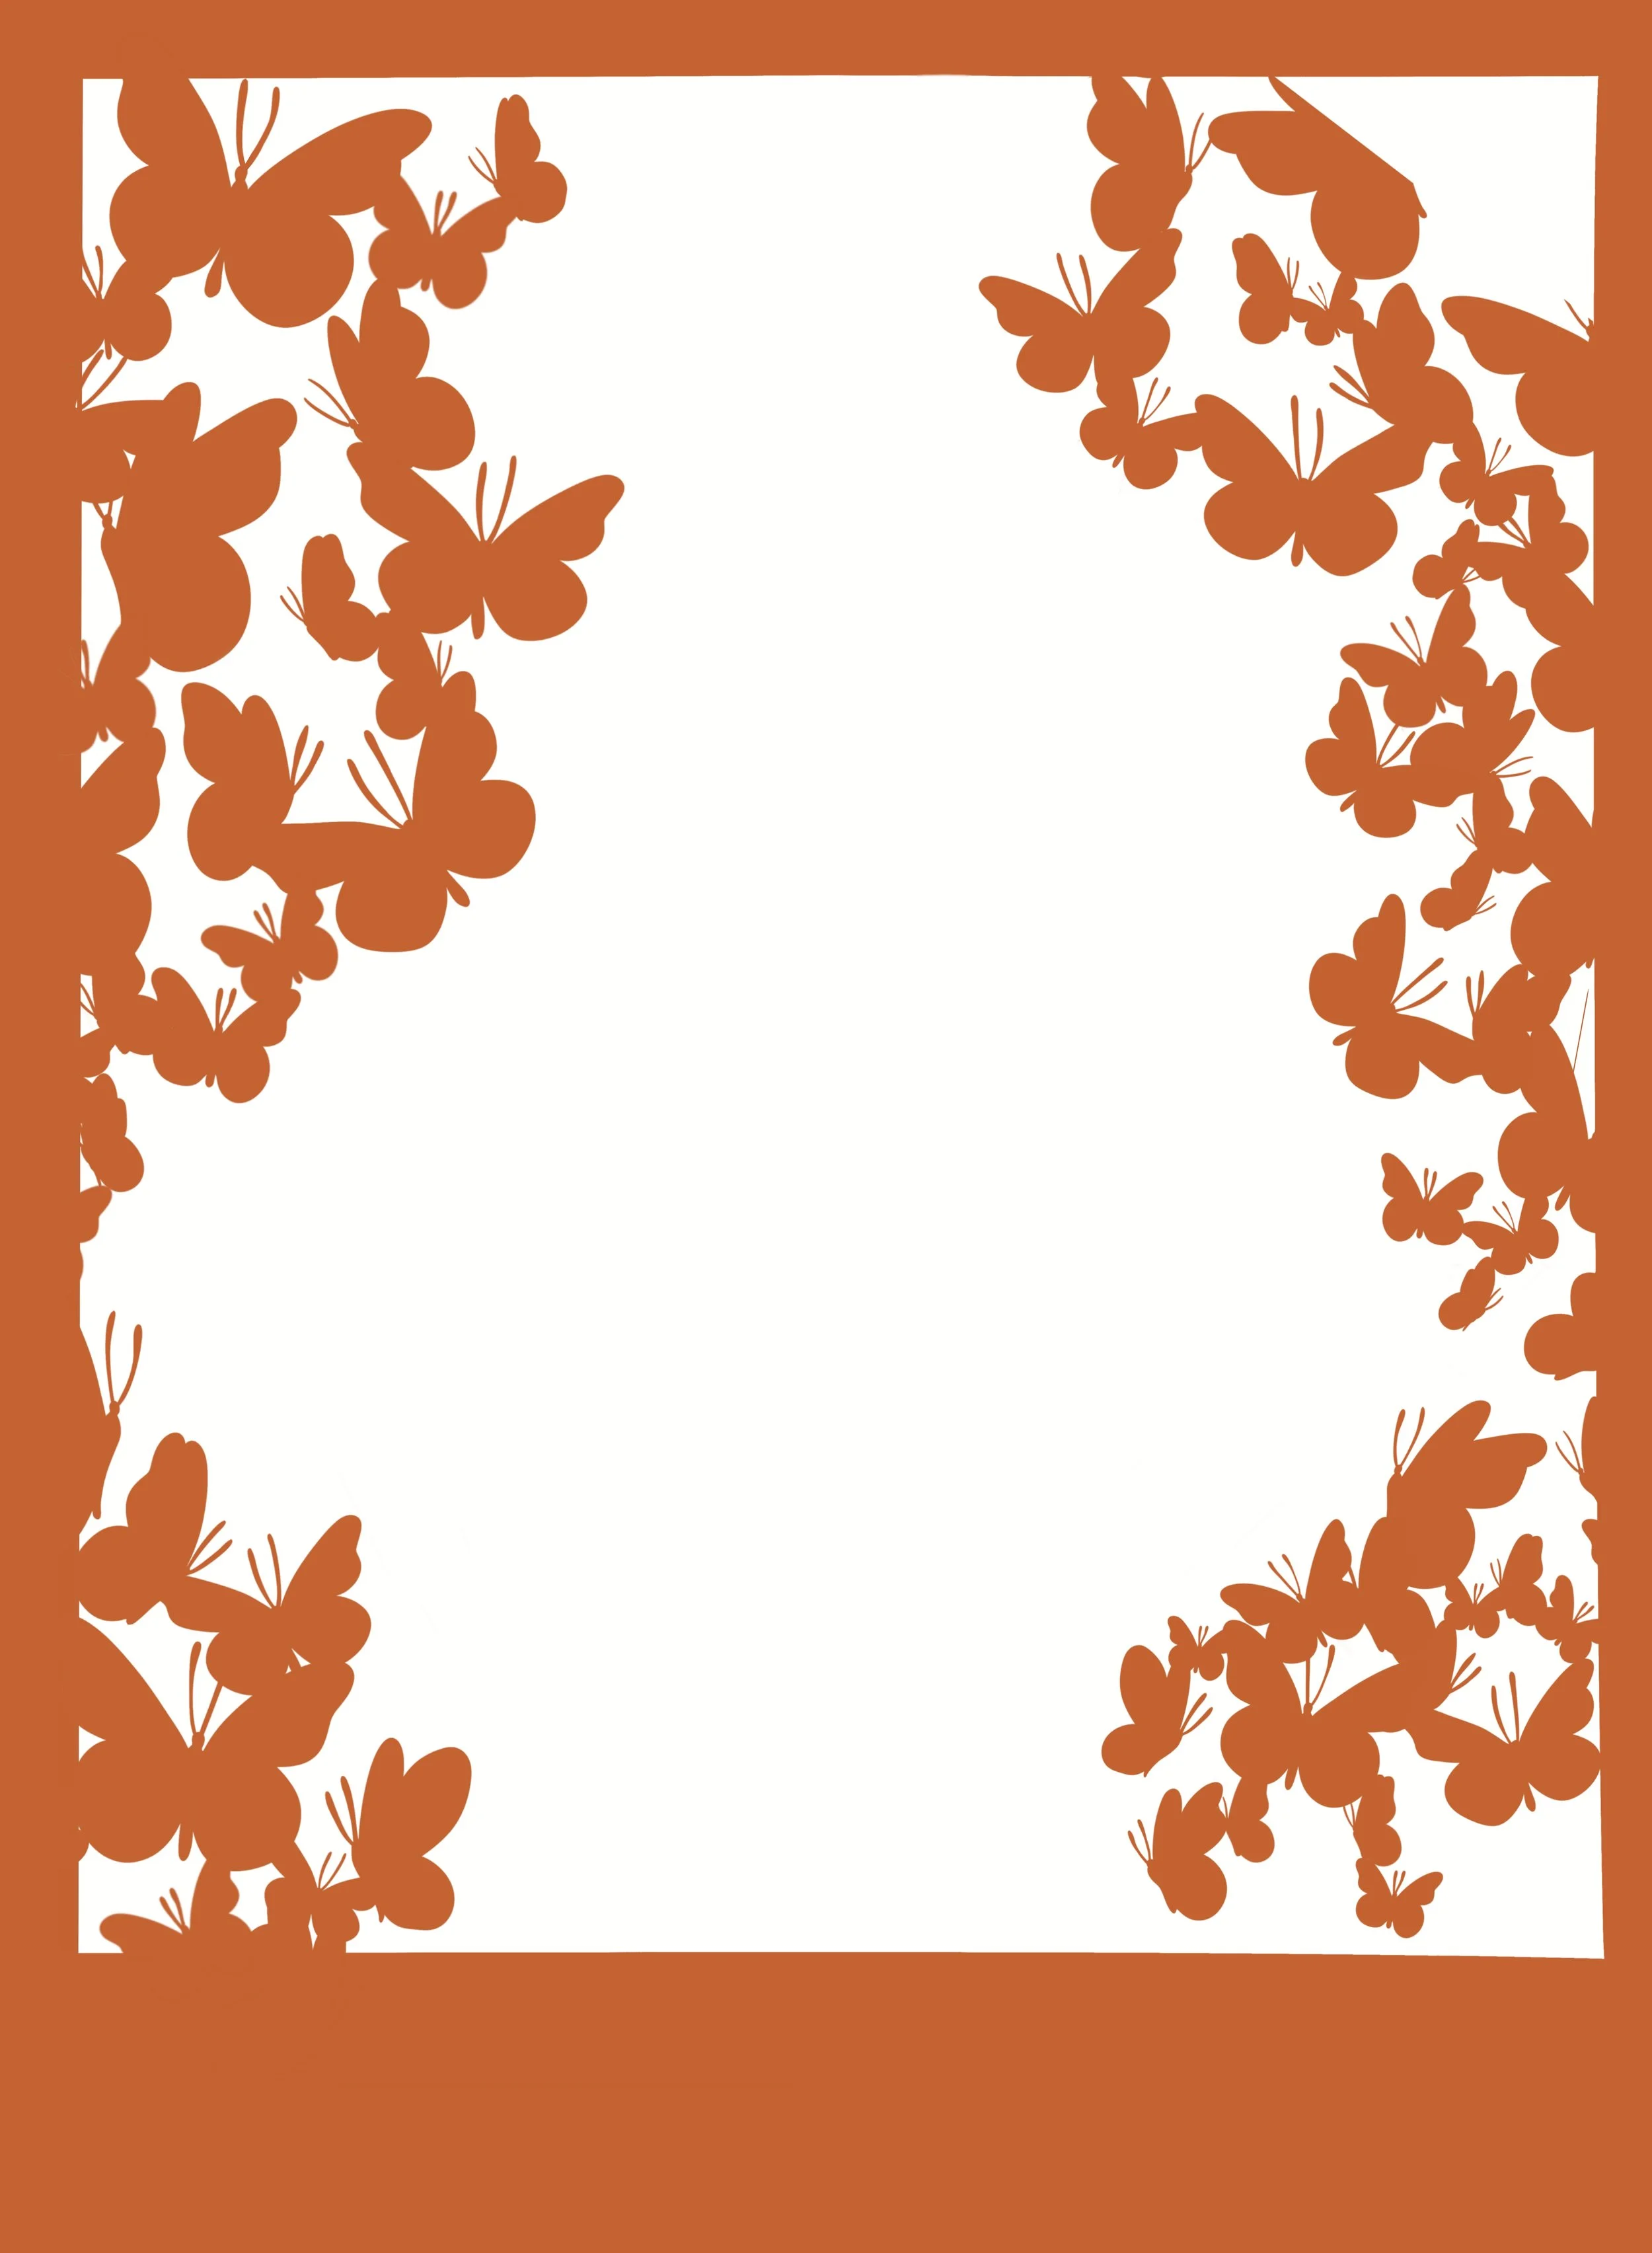
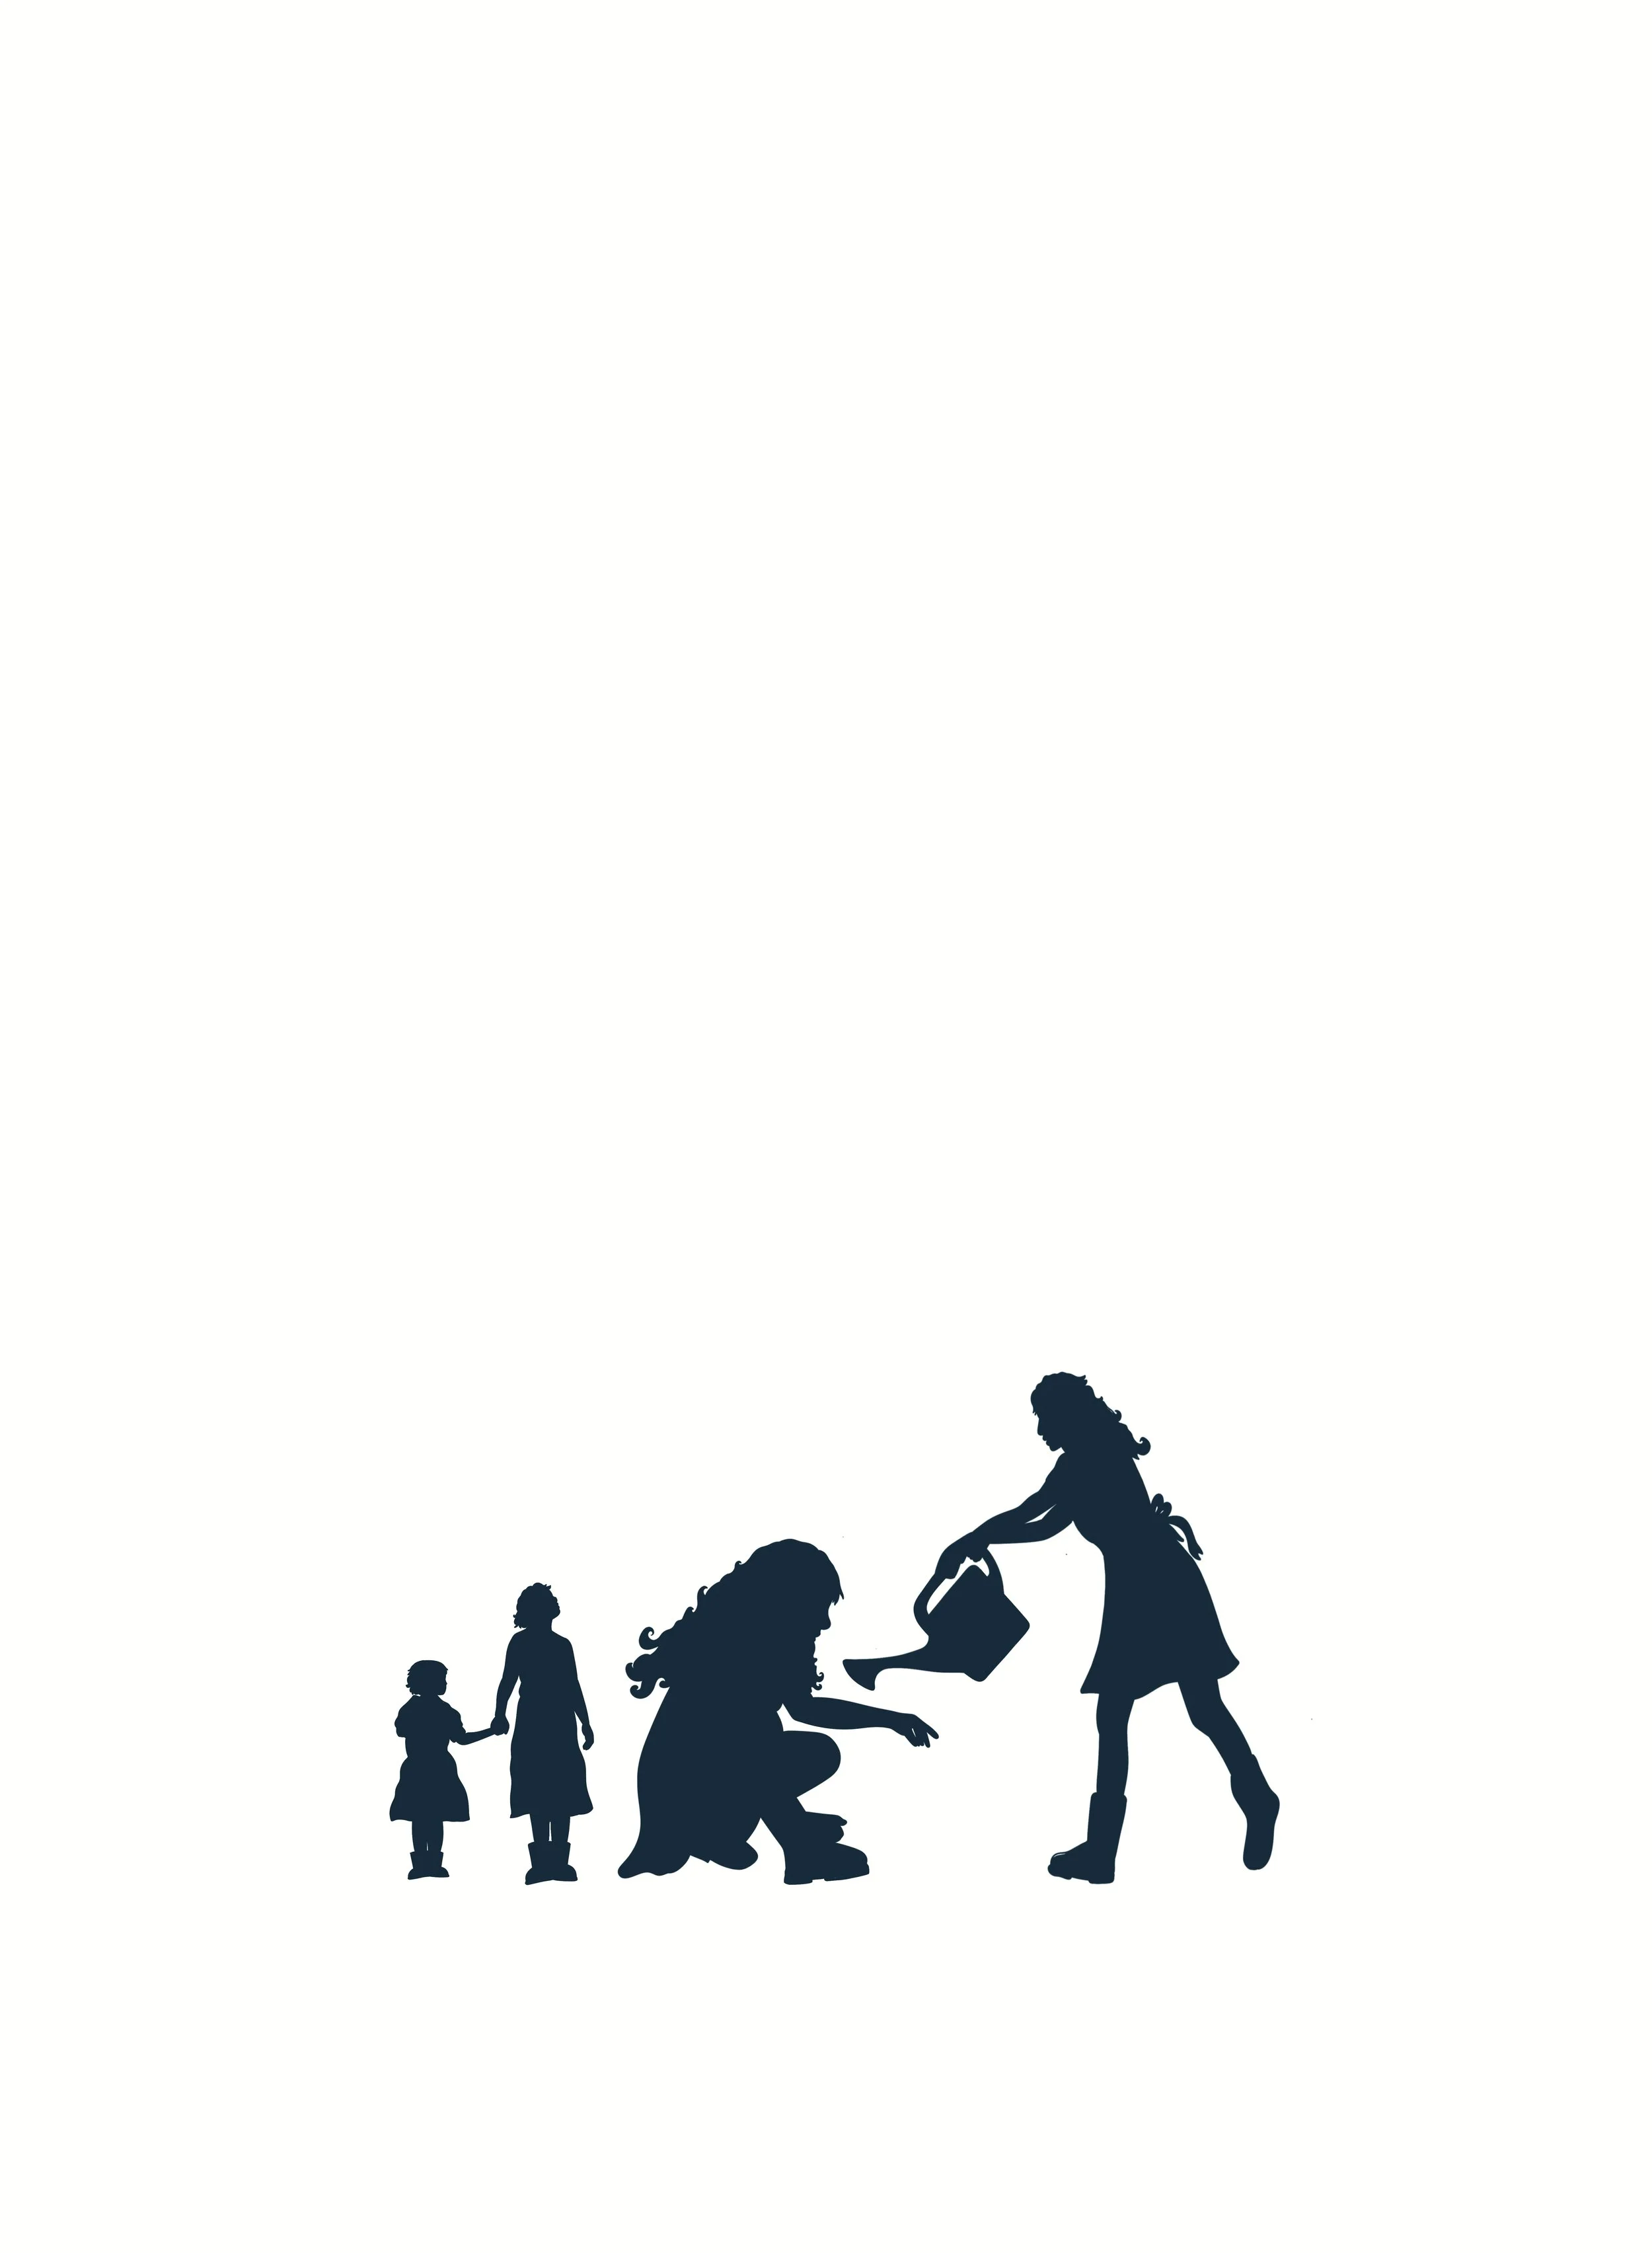
My completed piece, Wings Between Us, built on the concept of the Butterfly Effect, illustrating how small, quiet moments can spark lasting change. Using digital illustration, vector design, and Cricut-cut elements, I created layered clusters of butterflies that expanded across the page, symbolizing transformation, fragility, and the subtle power of kindness as it ripples outward and into the world.
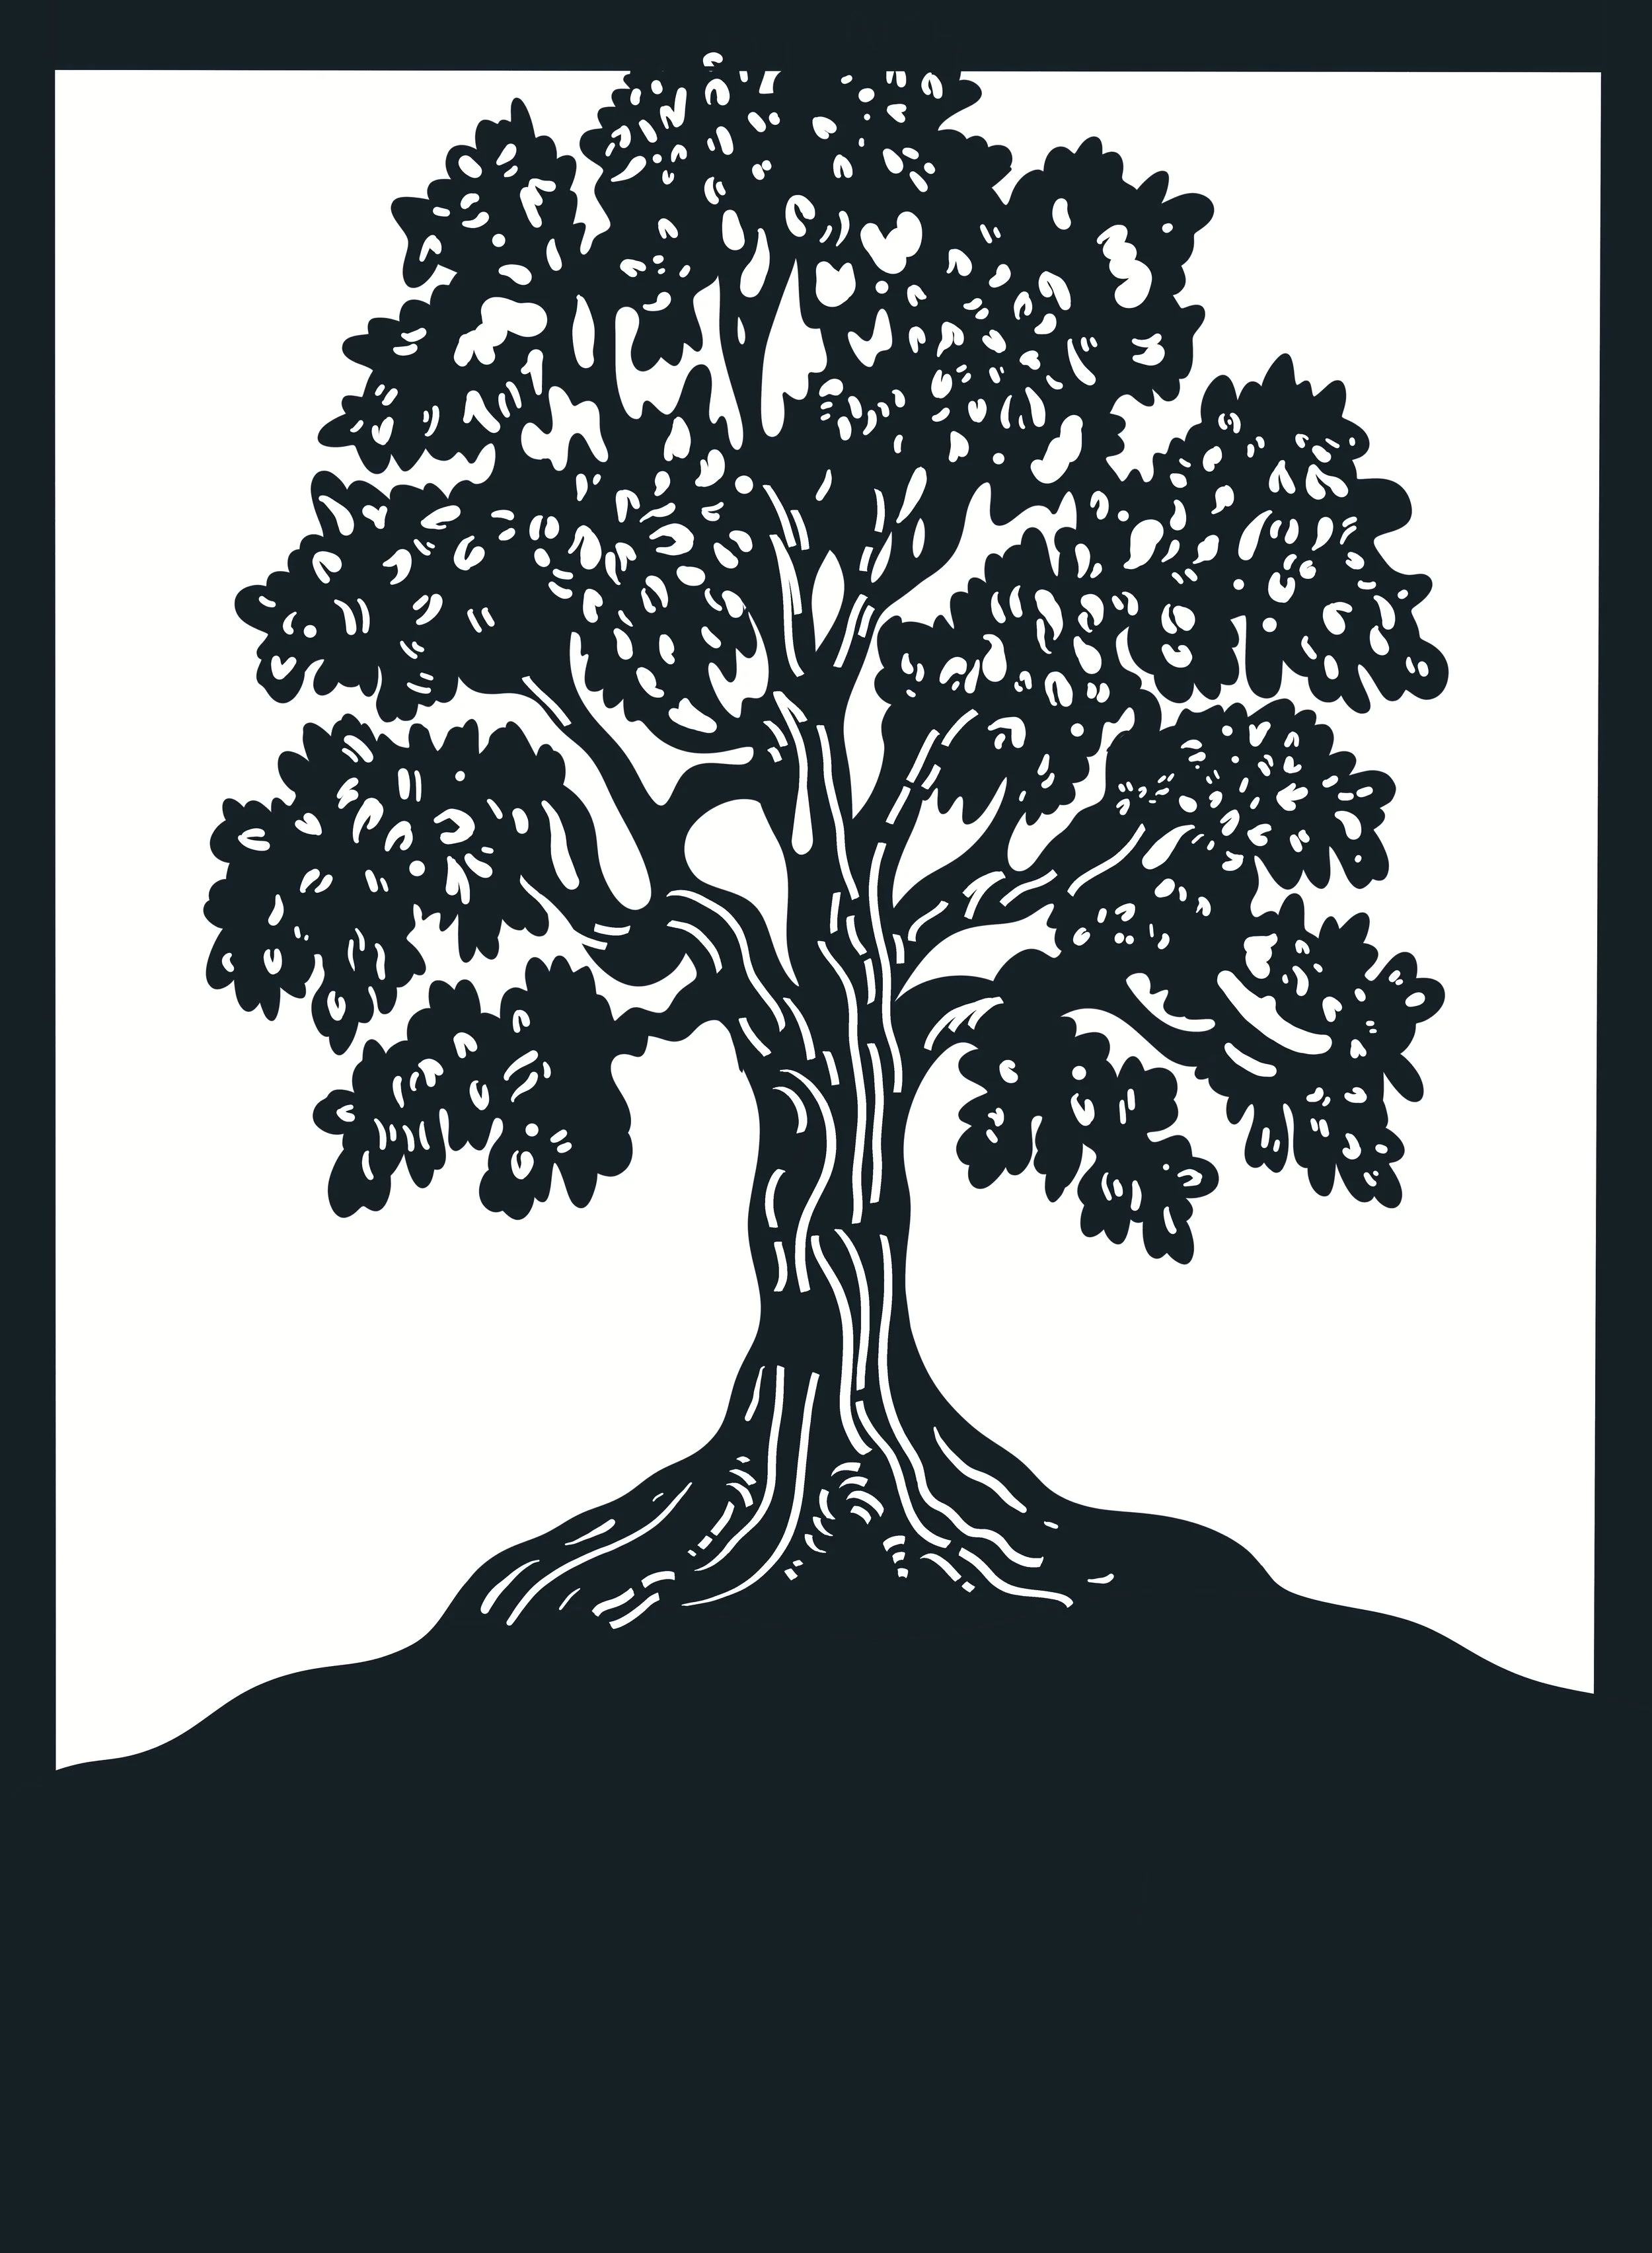
As the piece grew, it also became a reflection on the relationship between oneself and the environment—much like a seed becoming an oak. Each cut, weave, and layered form echoed the nurturing that shapes us into who we hope to become, and how the care we receive branches outward to influence future generations. The final dimensional layers and mixed-media elements deepen this metaphor of growth, connection, and enduring impact.
-
Procreate, Adobe Illustrator, Cricut Design Space, Cricut Joy Xtra,
-
Digital Illustration, Collage, Paper Cutting, Palimpsest
-
Dannell MacIlwraith

Project Goals
-
1. Explore 3D Form in Palimpsest
I hoped to explore how various forms of imagery can coexist in sculptural means to convey personal or social stories, particularly while exhibiting and experimenting with PALIMPSEST.
-
2. Balance Precision & Intuition
Part of my motivation was to challenge myself to combine meticulous craft (cutting, layering, construction) with intuitive, experimental processes (collage, mark-making, improvisation).
-
3. Interactivity & Discovery
I was interested in making a project that would invite curiosity—a piece that would compel viewers to lean closer, look deeper into the box, and discover something unexpected. This mirrors my belief that design should create experiences of wonder.
Ideas and Exploration
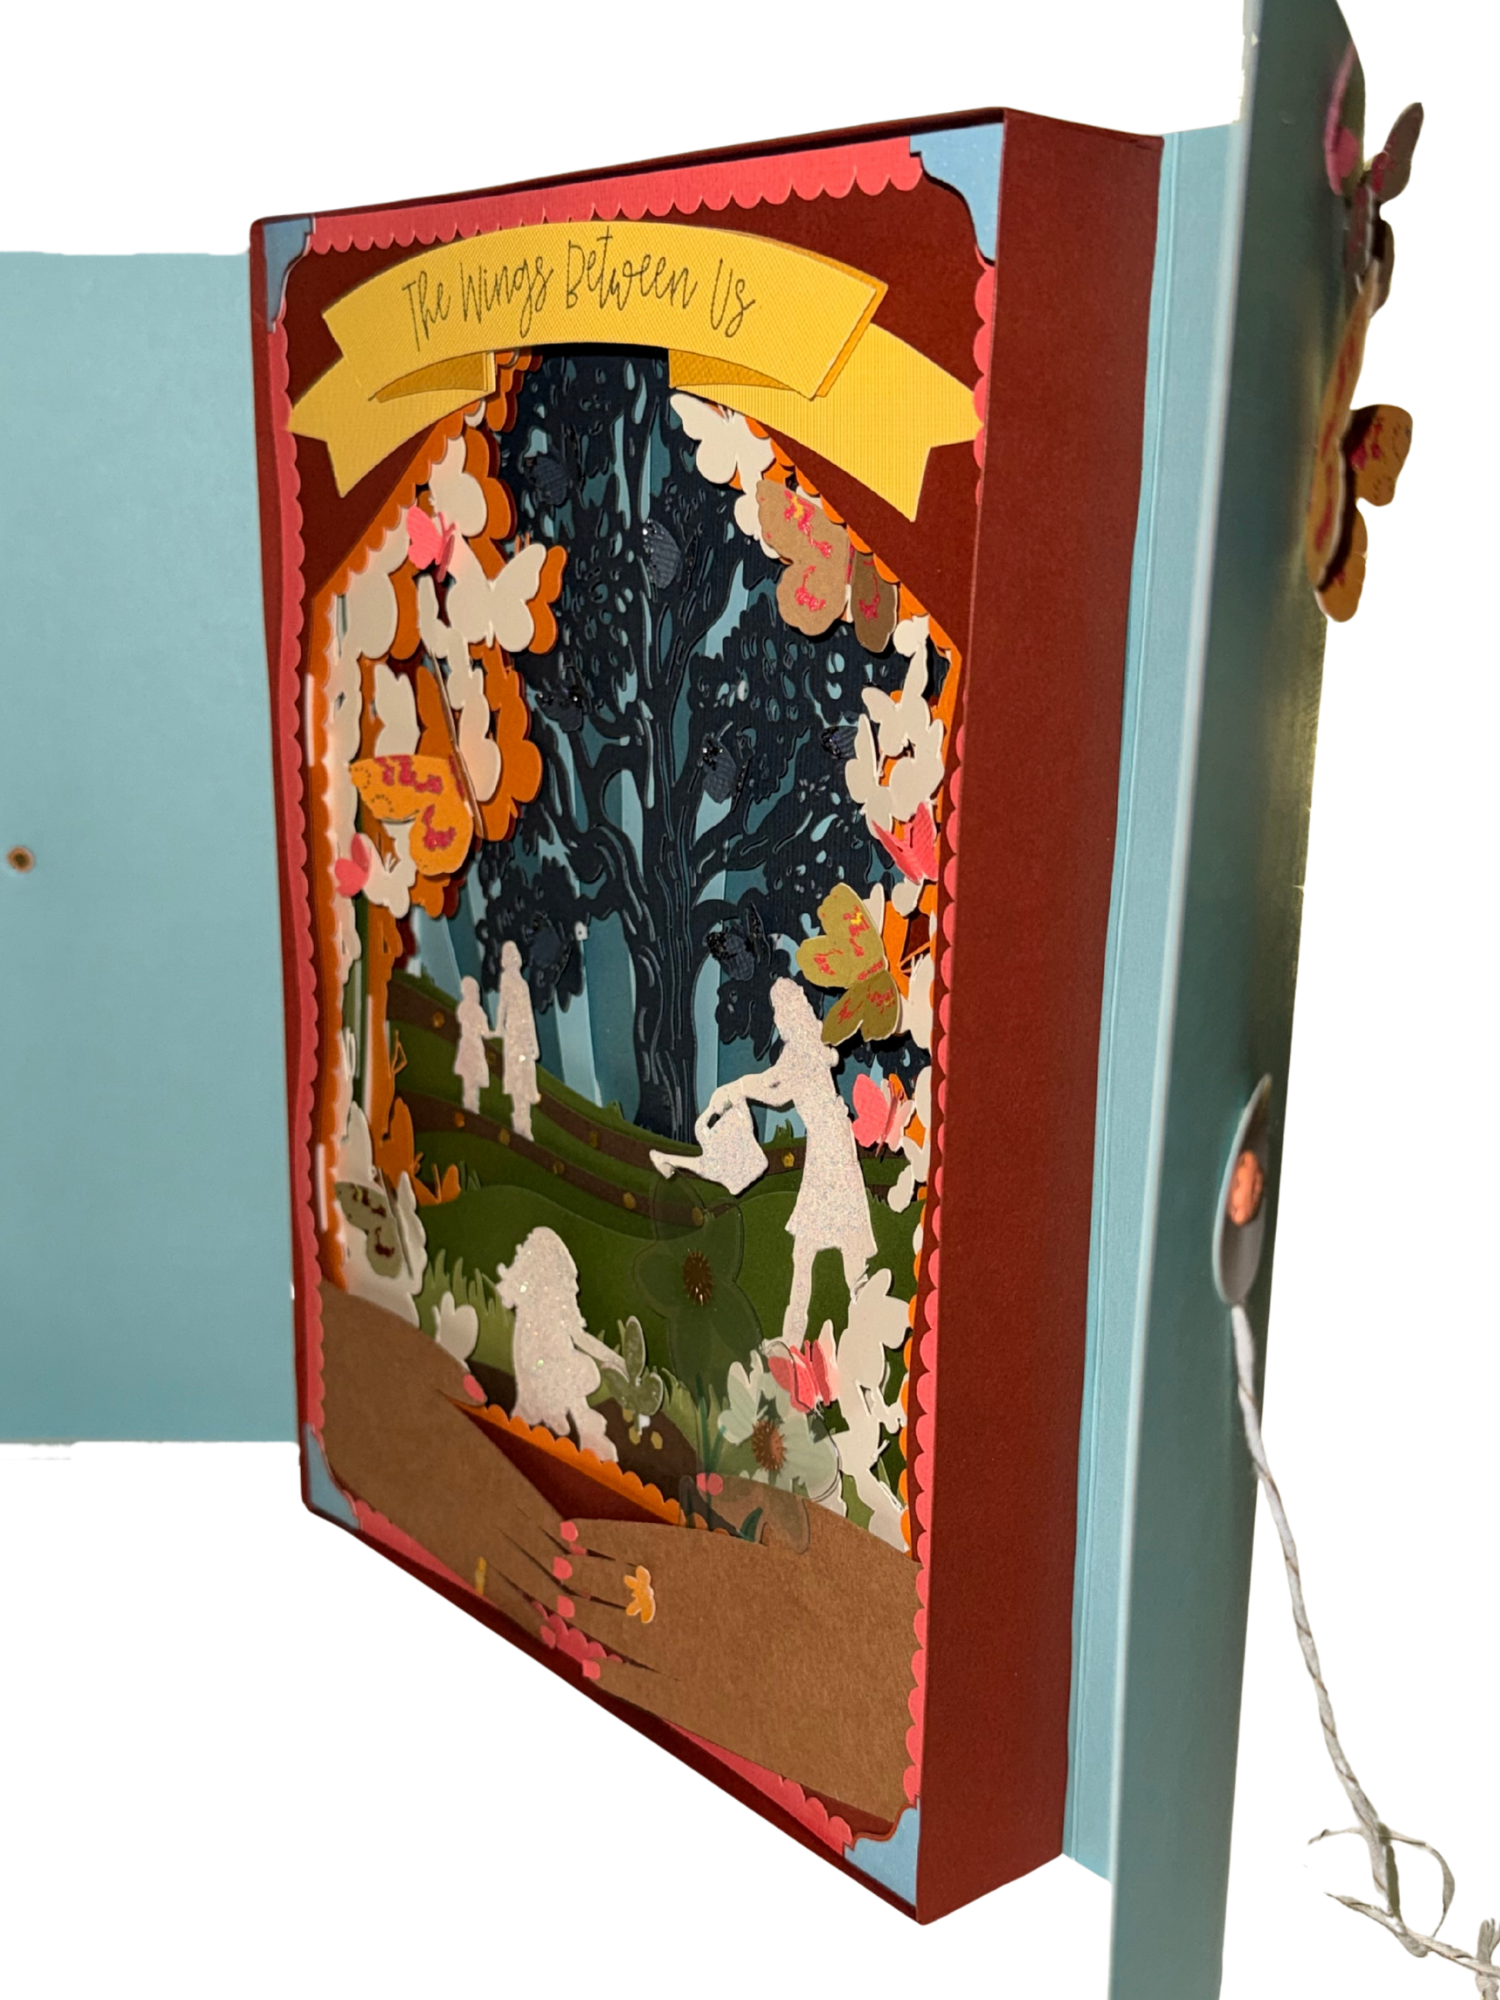
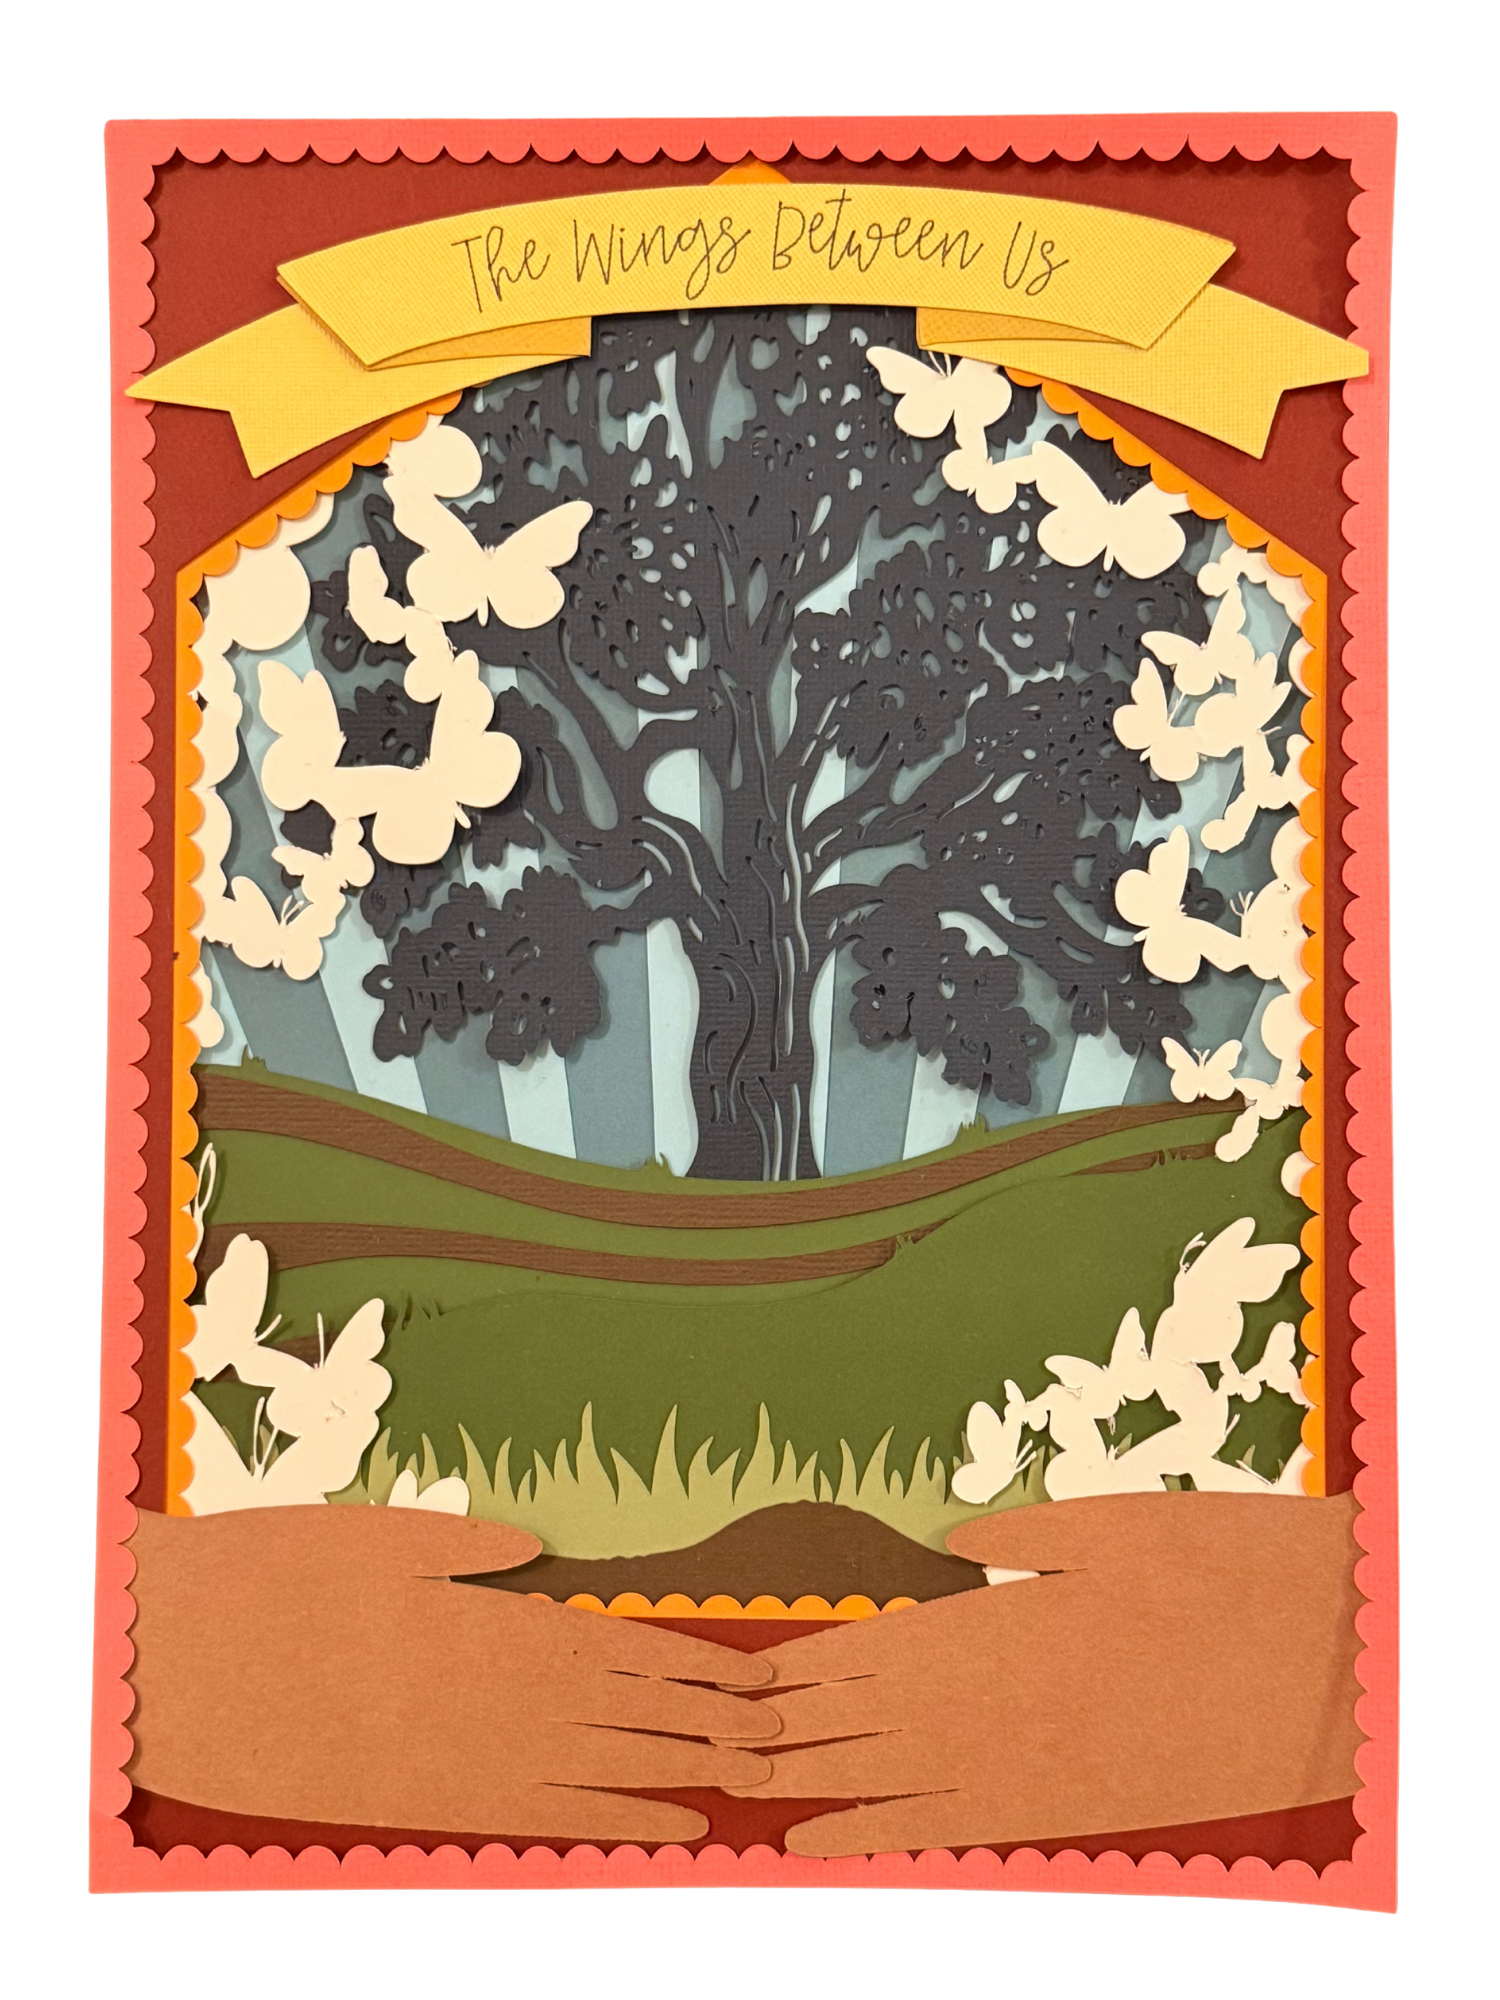
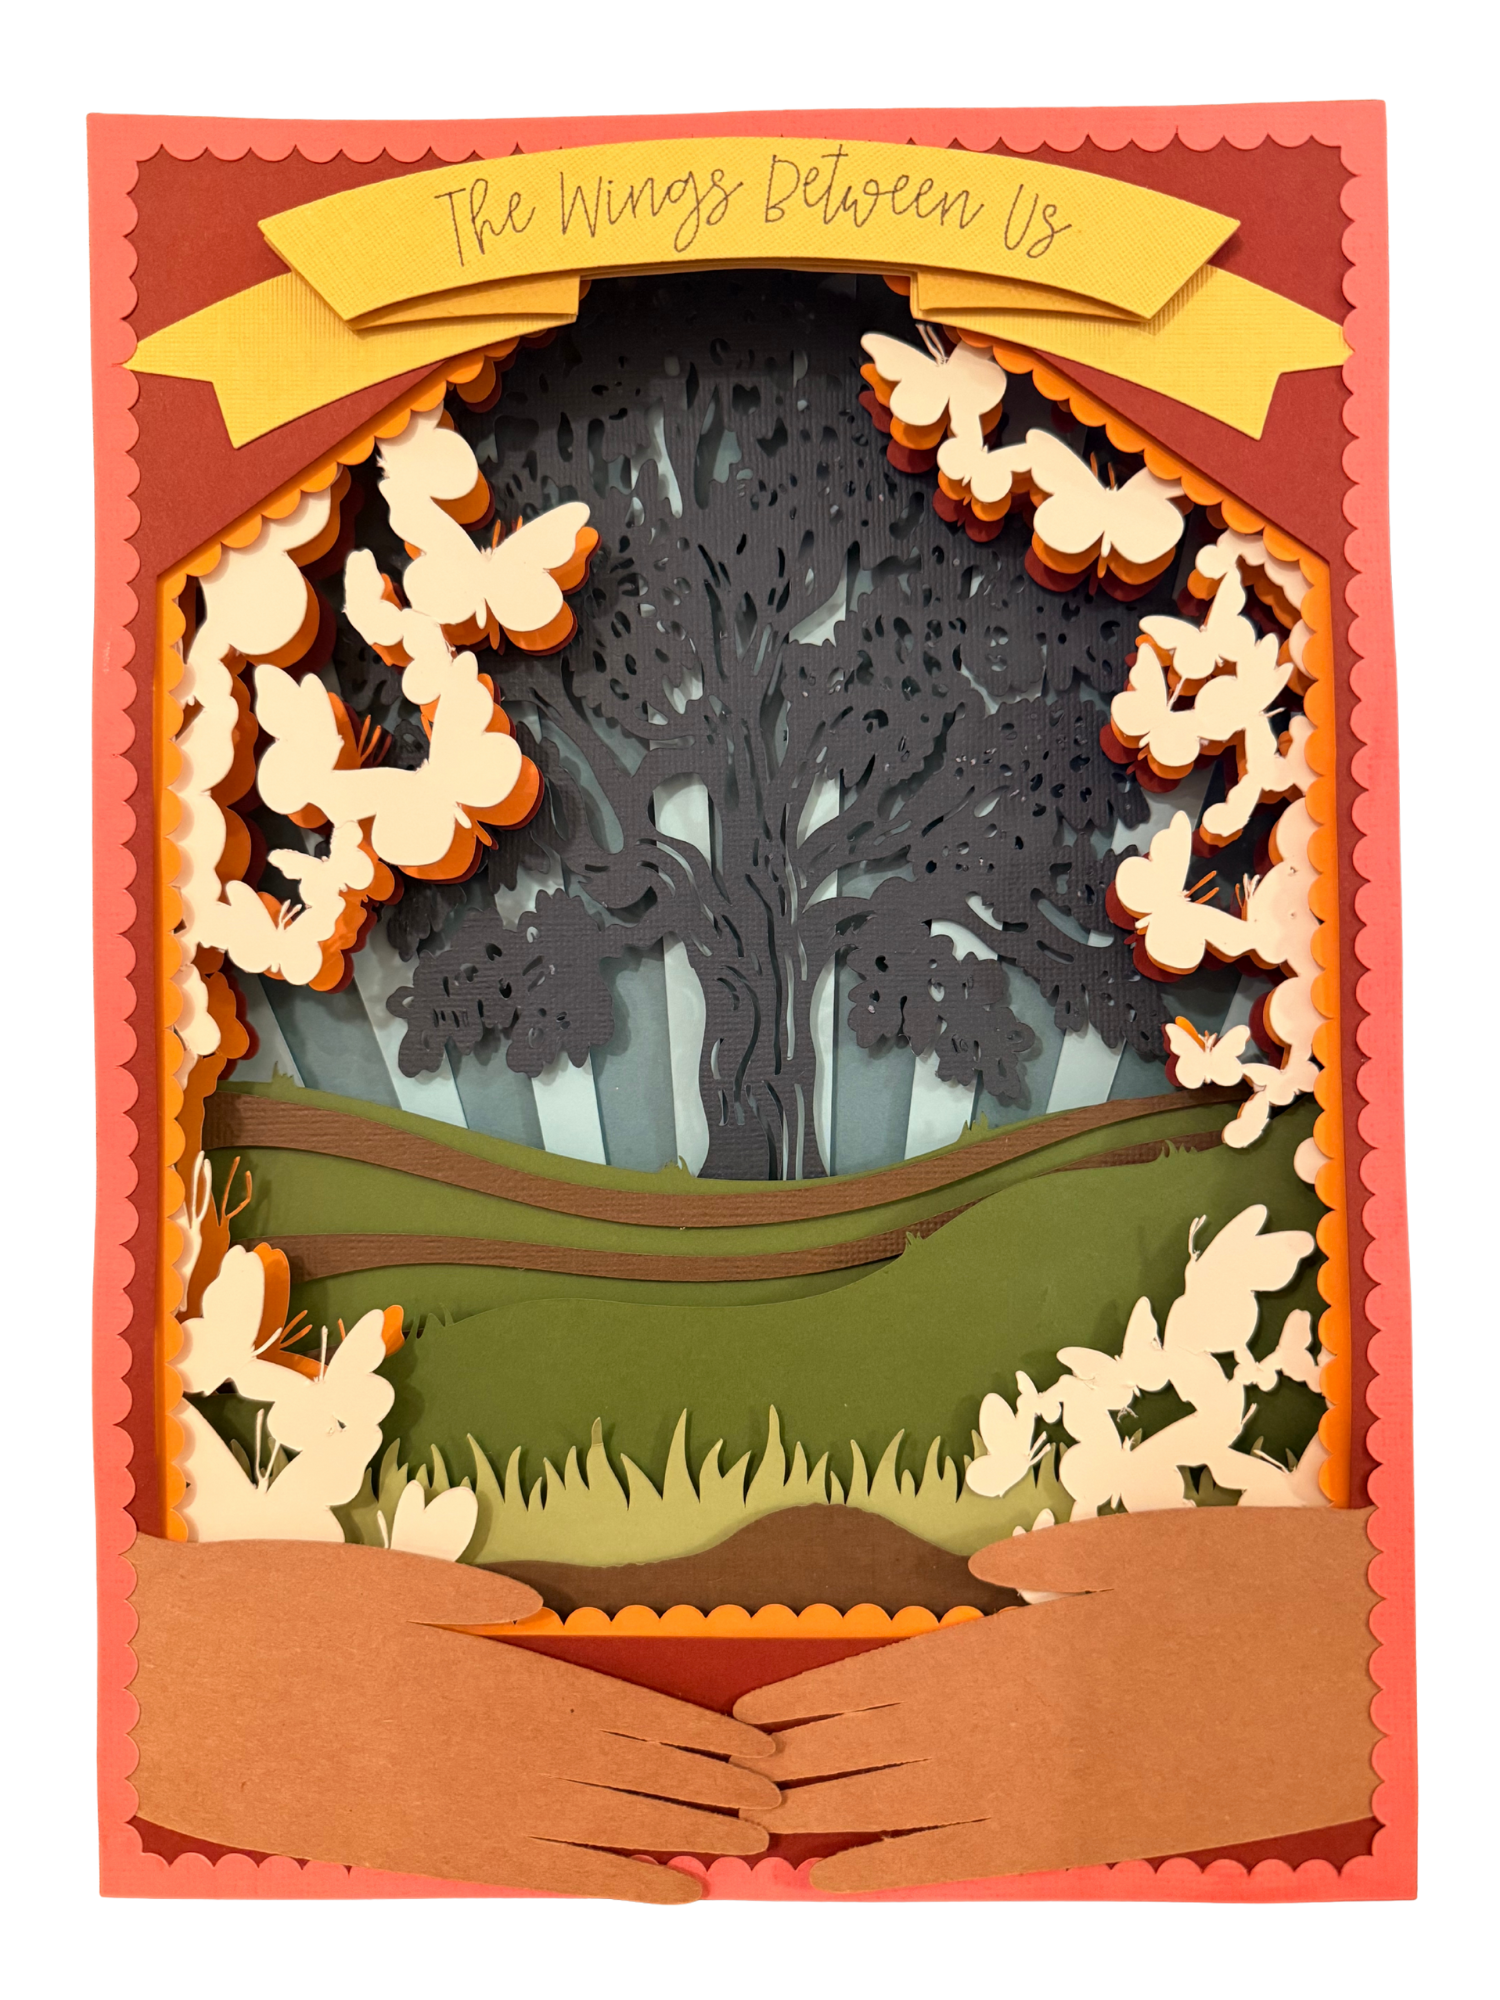
Behind the implementation of palimpsest within a layered story such as a shadowbox.
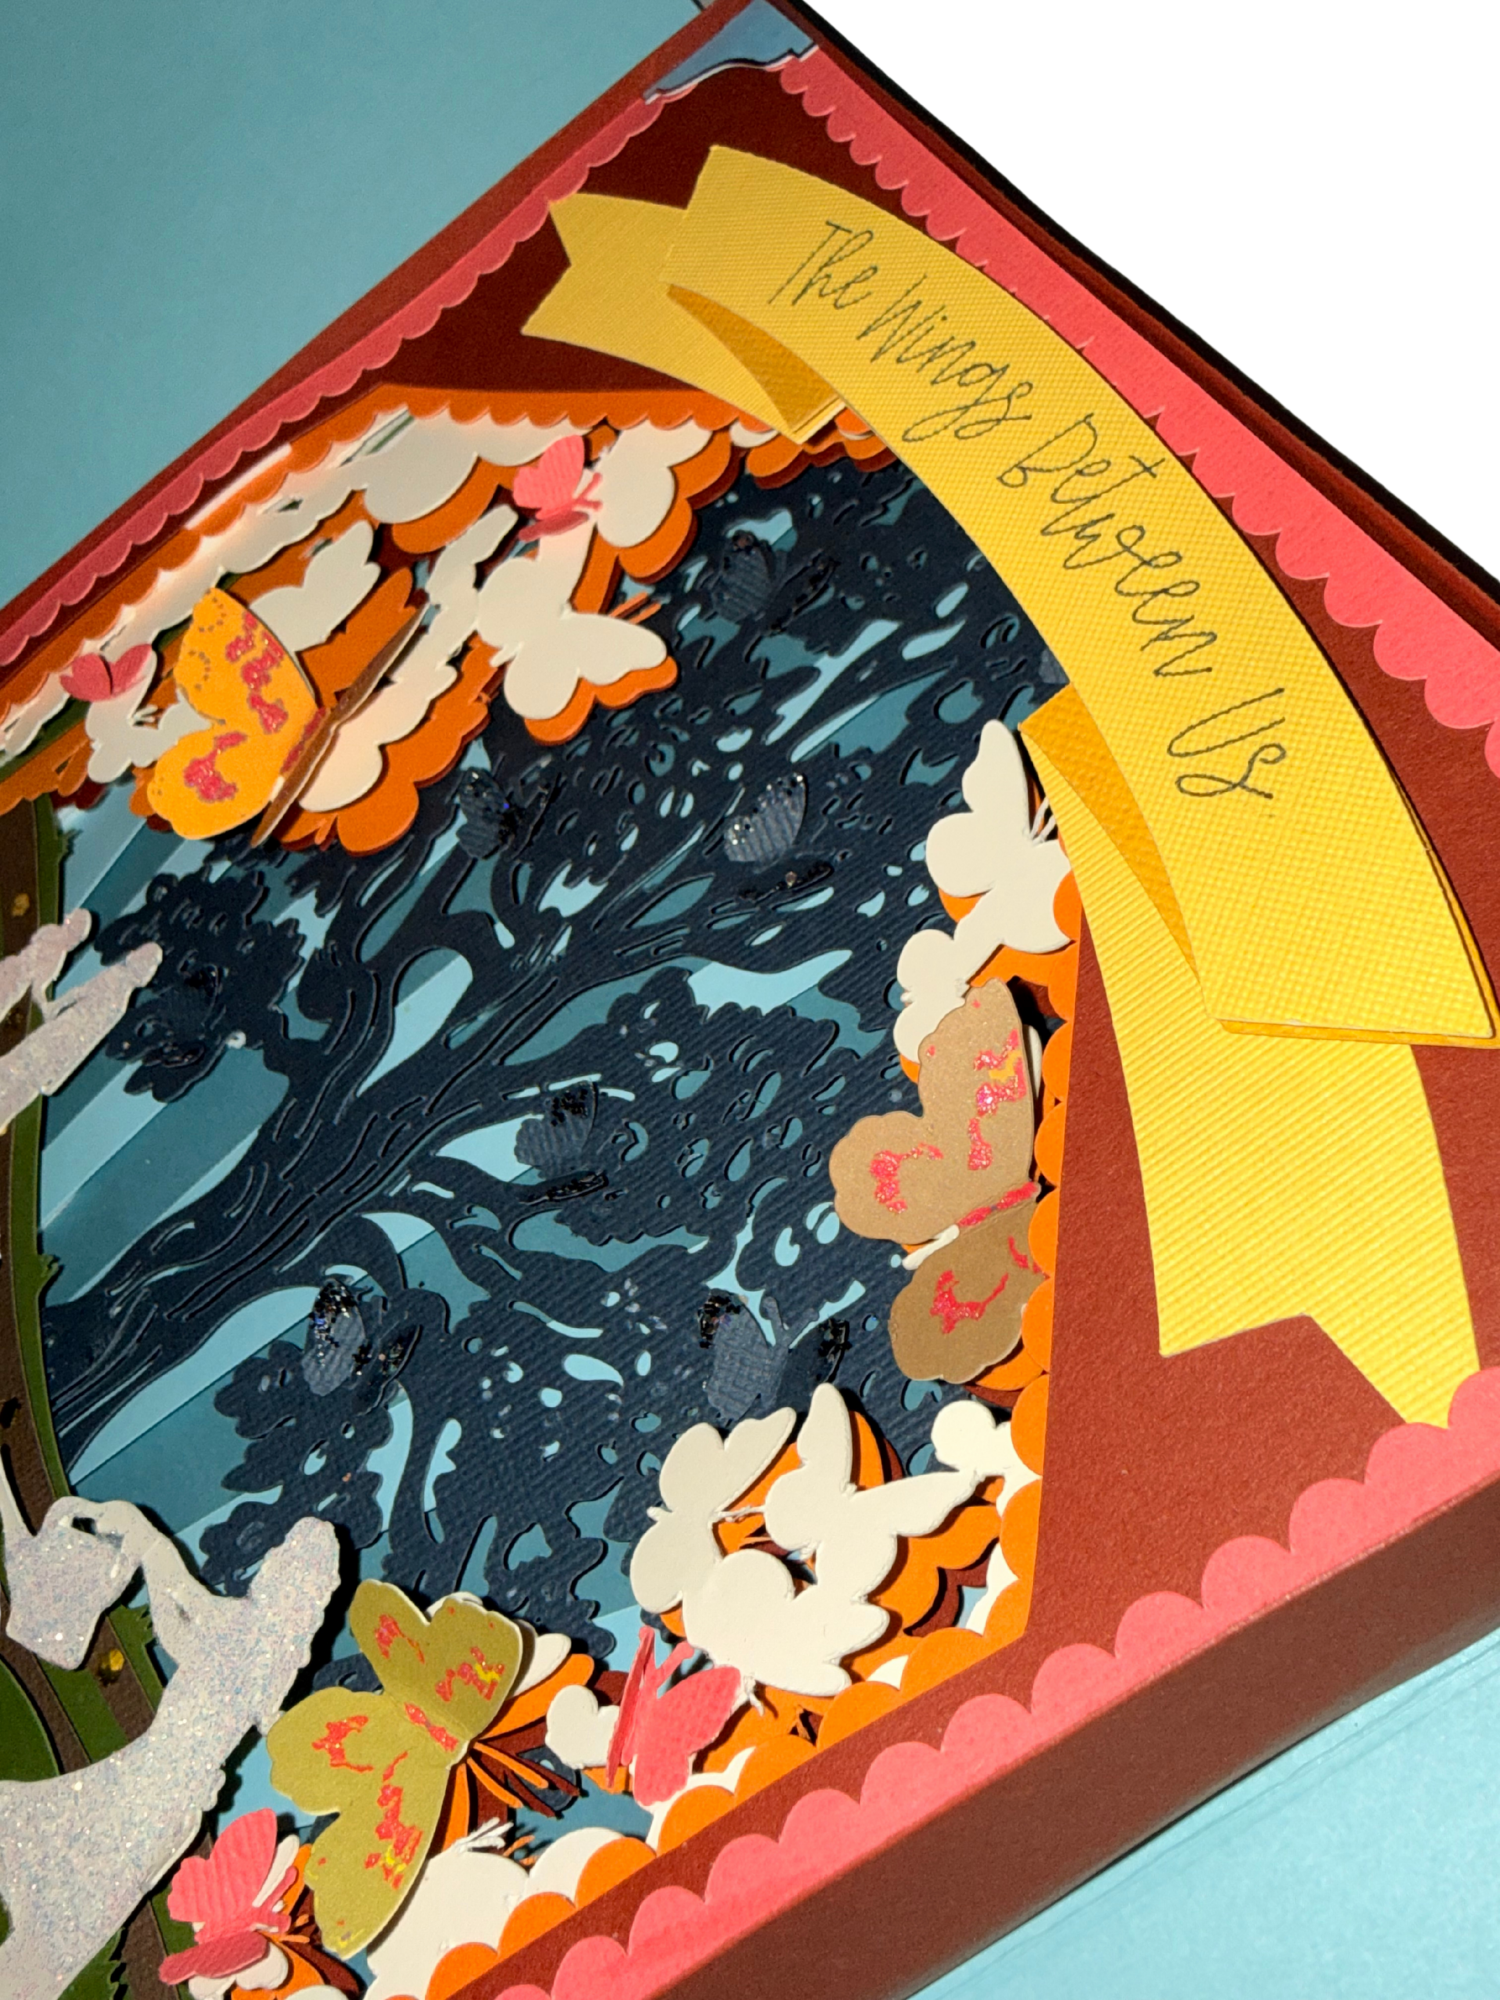
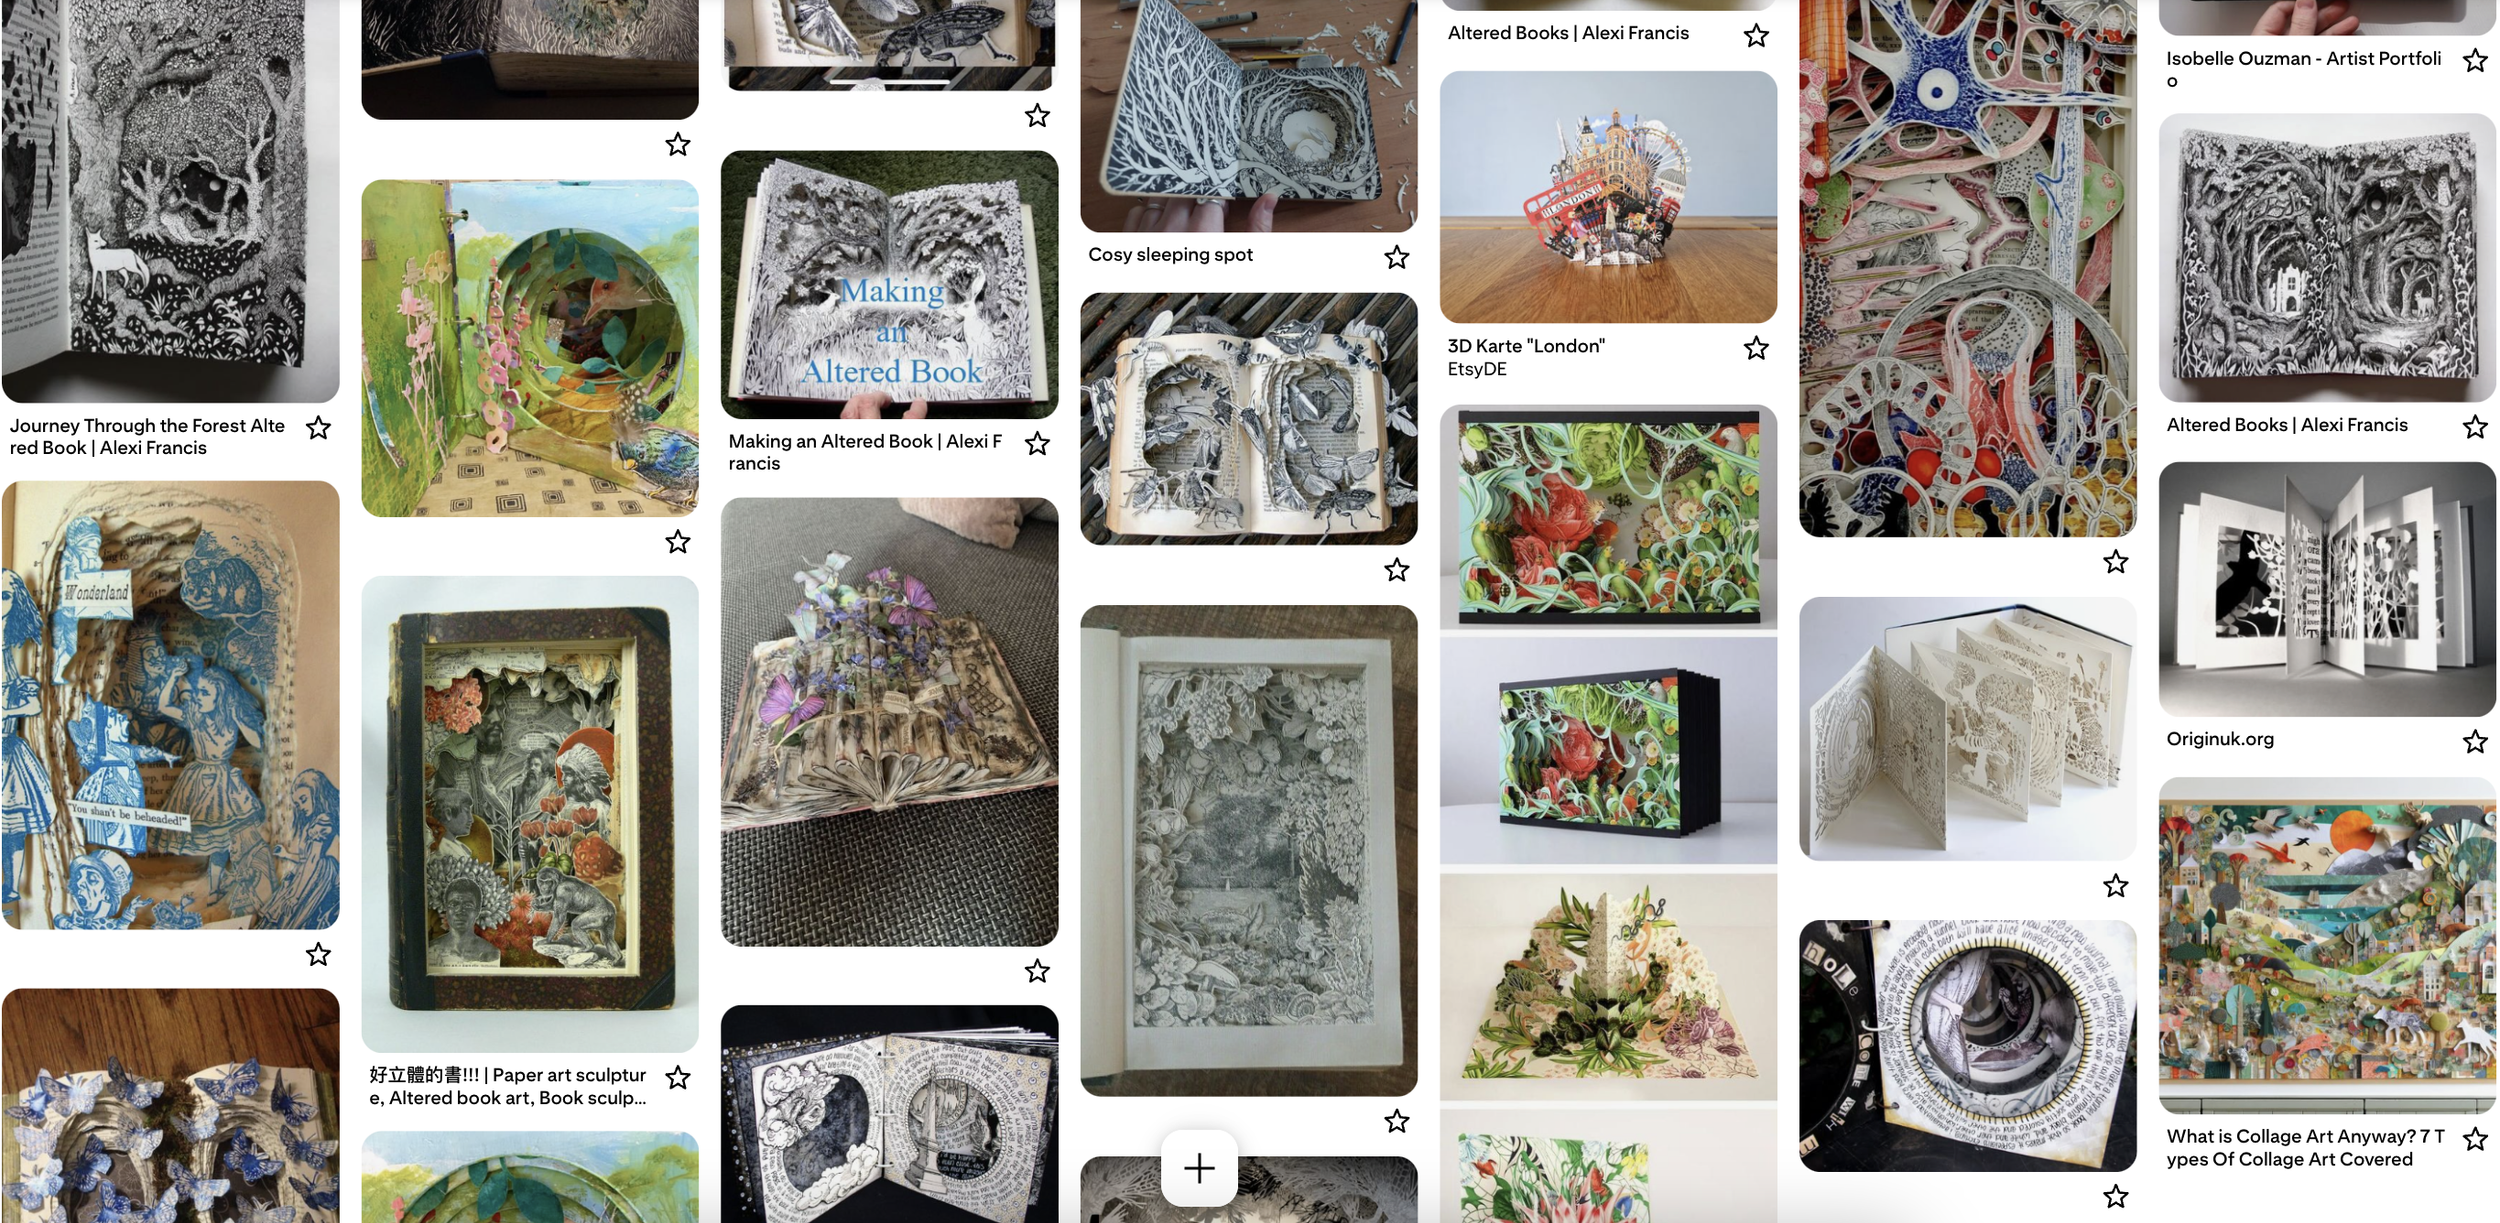
I’ve always been drawn to the quiet wonder of turning a page and discovering depth, texture, and hidden details that invite you to linger. That sense of whimsy guided the piece: the idea that stories, images, and memories can weave through layers the way light filters through a forest canopy. By building dimension through cut paper, collage, and overlapping forms, I wanted to recreate the enchanting experience of traveling through a story where every glimpse reveals something new that moves, flutters, and grows with you.

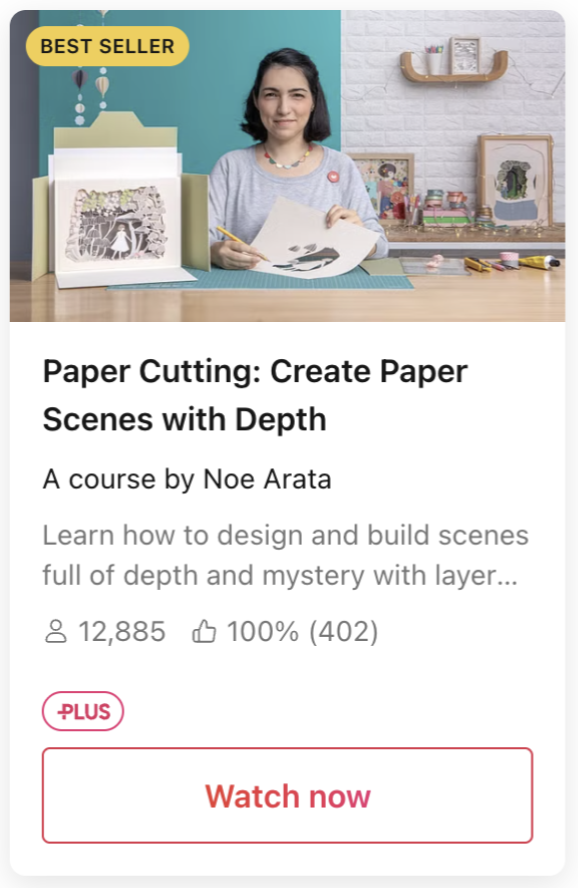
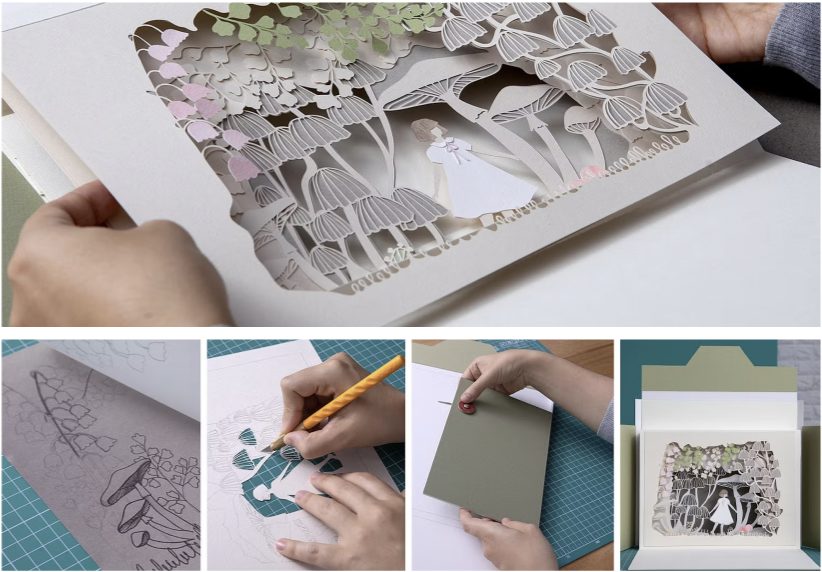
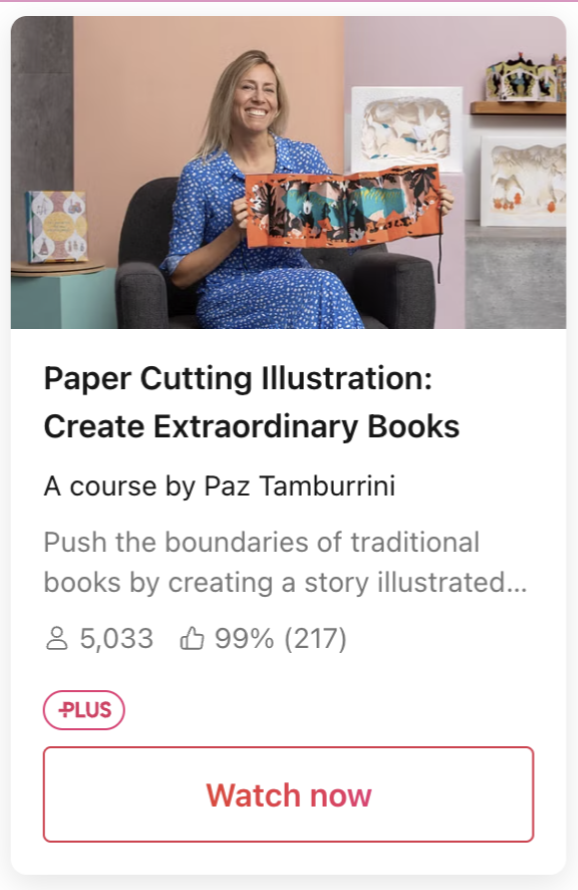
Learning how to layer…
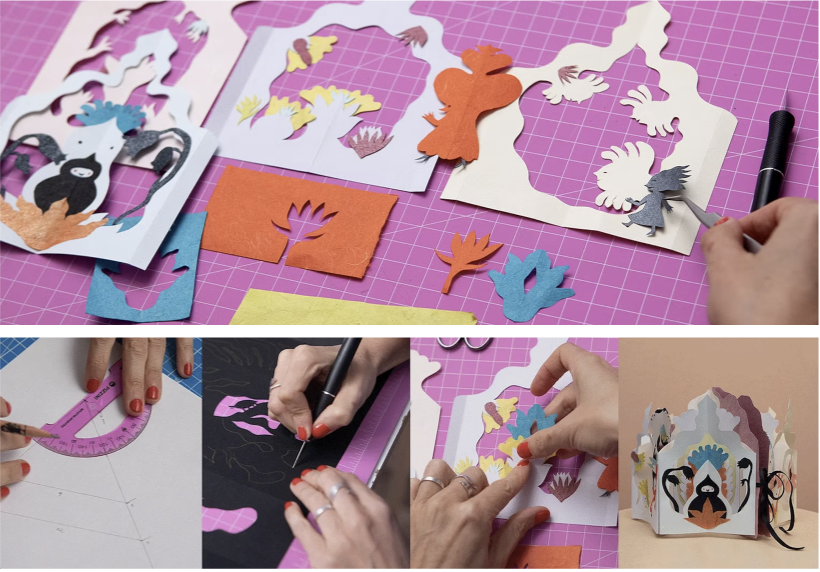
Part of my learning experience was understanding how to build a layered shadowbox. To do so, I subscribed to Domestika Plus so that I could access several very helpful courses such as the following that I have shown below. One of the courses is described as: “In this course, learn to create a fantasy scene using paper cutting without needing any previous experience. Noe explains step by step the cornerstones of this technique, how to approach the templates for a project, how to make the foldable structure that serves as the base, and how to exhibit your pieces without frames.” This was exactly what I was looking for and the lessons were particularly helpful when creating a custom sized image that did not fit into a standard frame. It allowed me to quite literally go outside of the box and create my own space within the canvas that I was choosing to work on.
The Cut File
Illustrating the cut file in Procreate
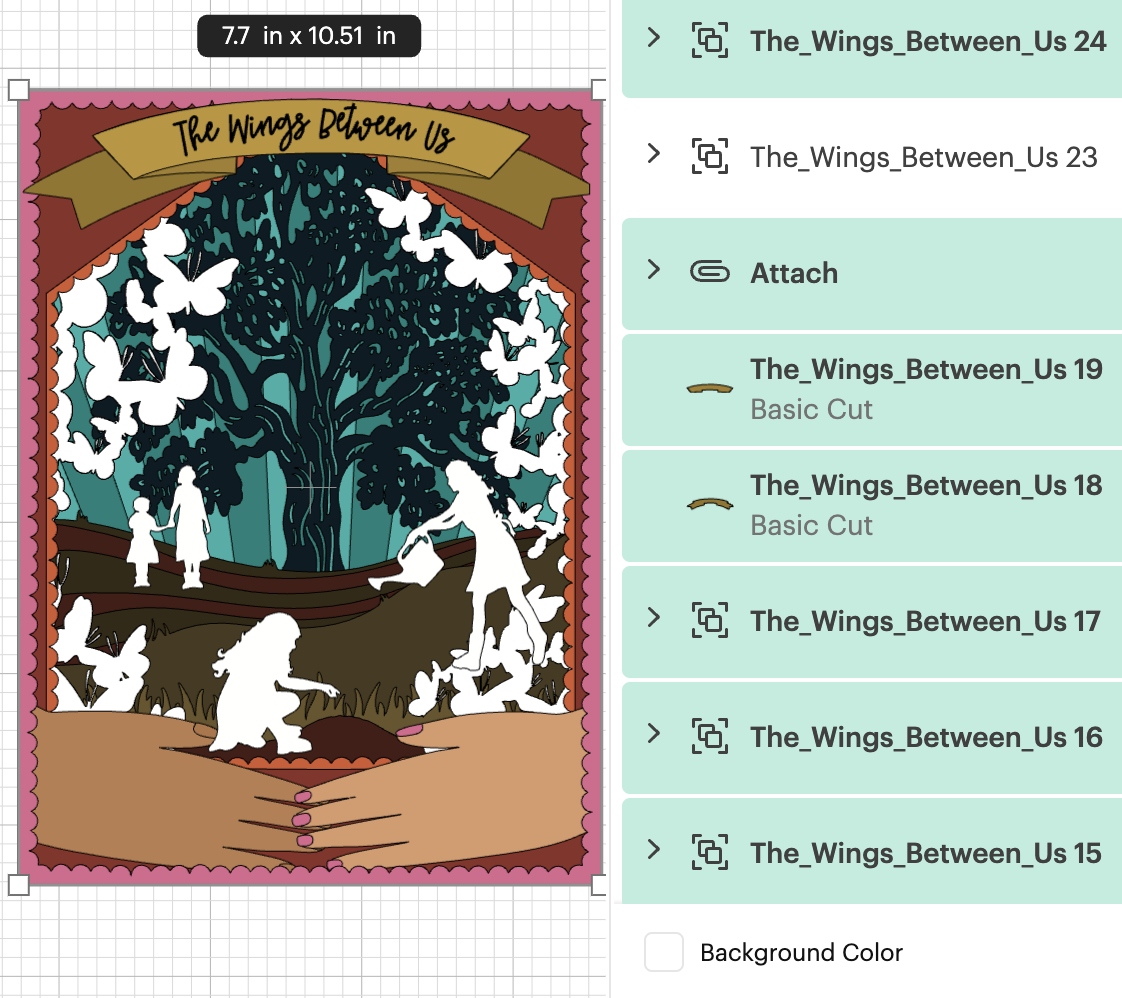
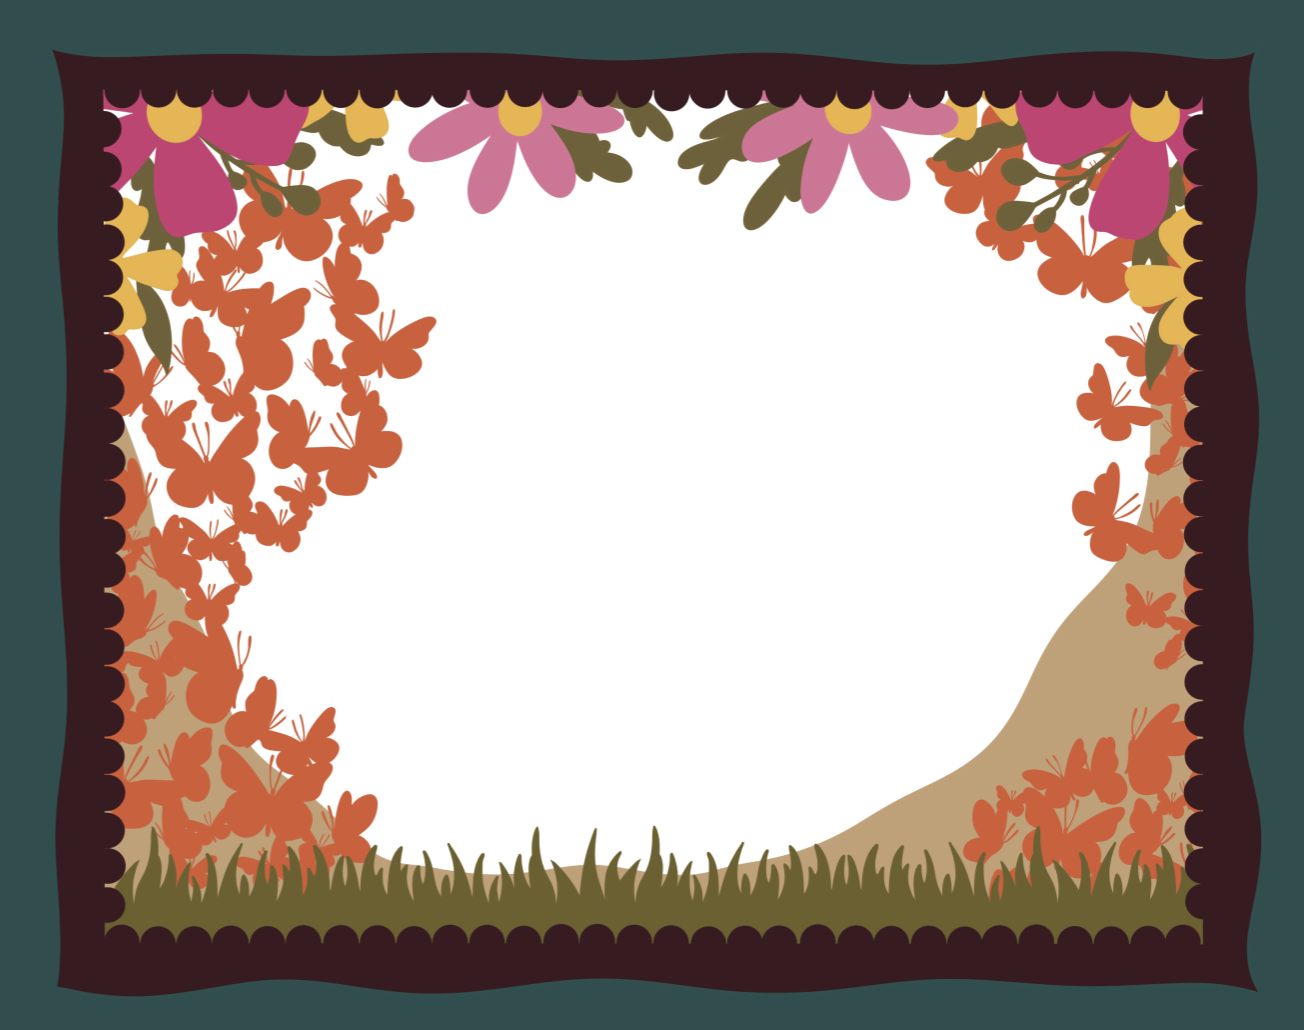
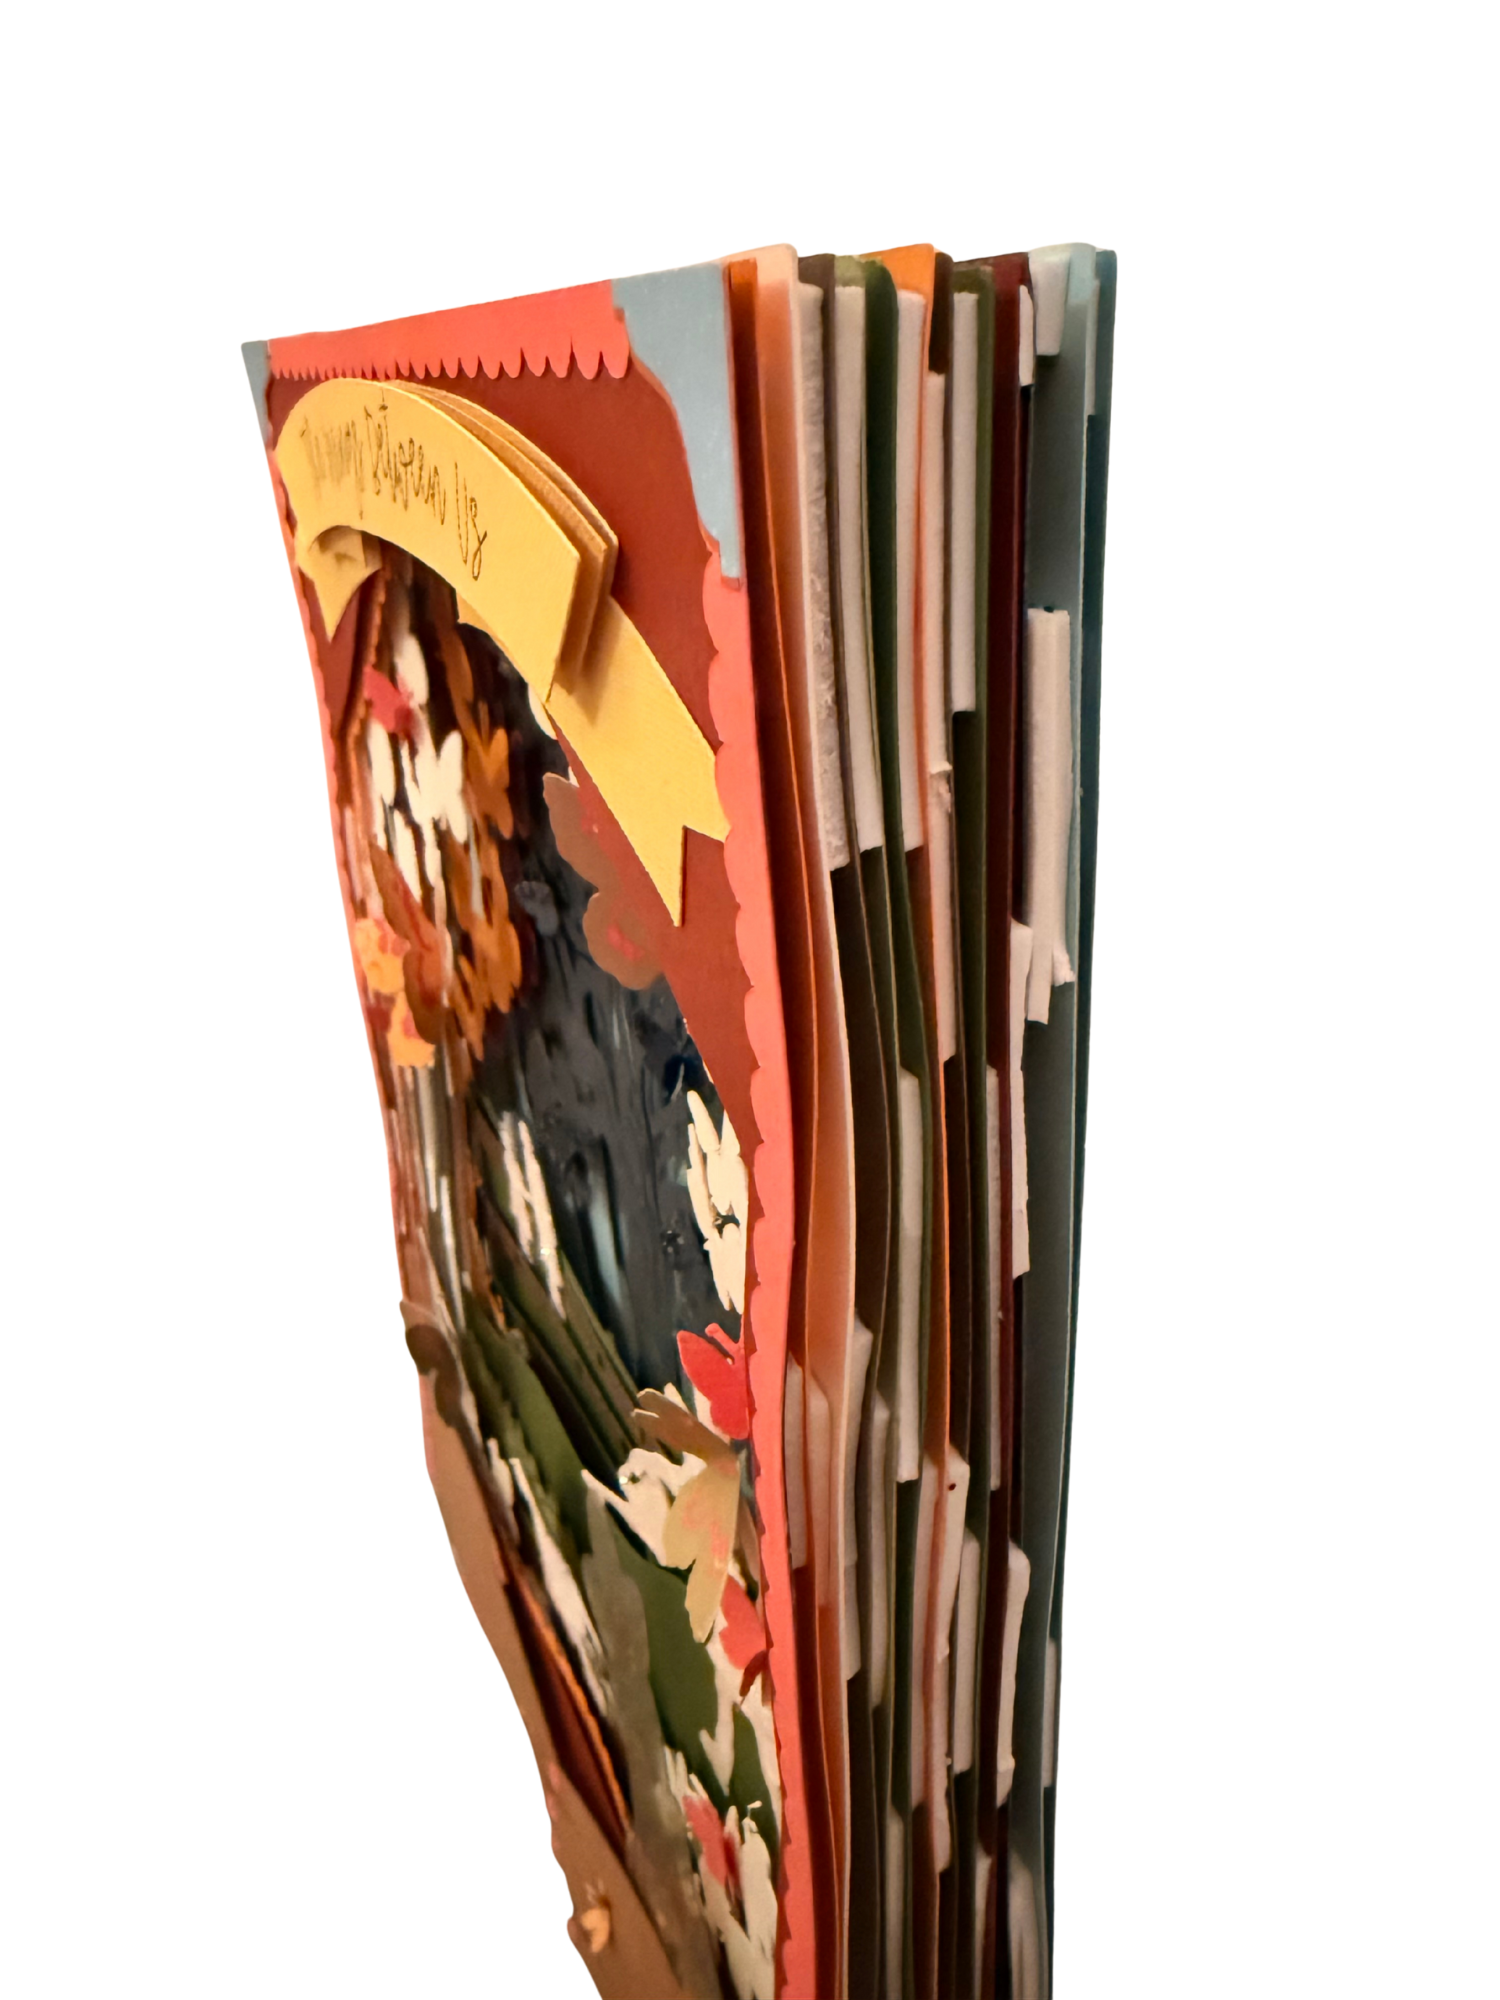
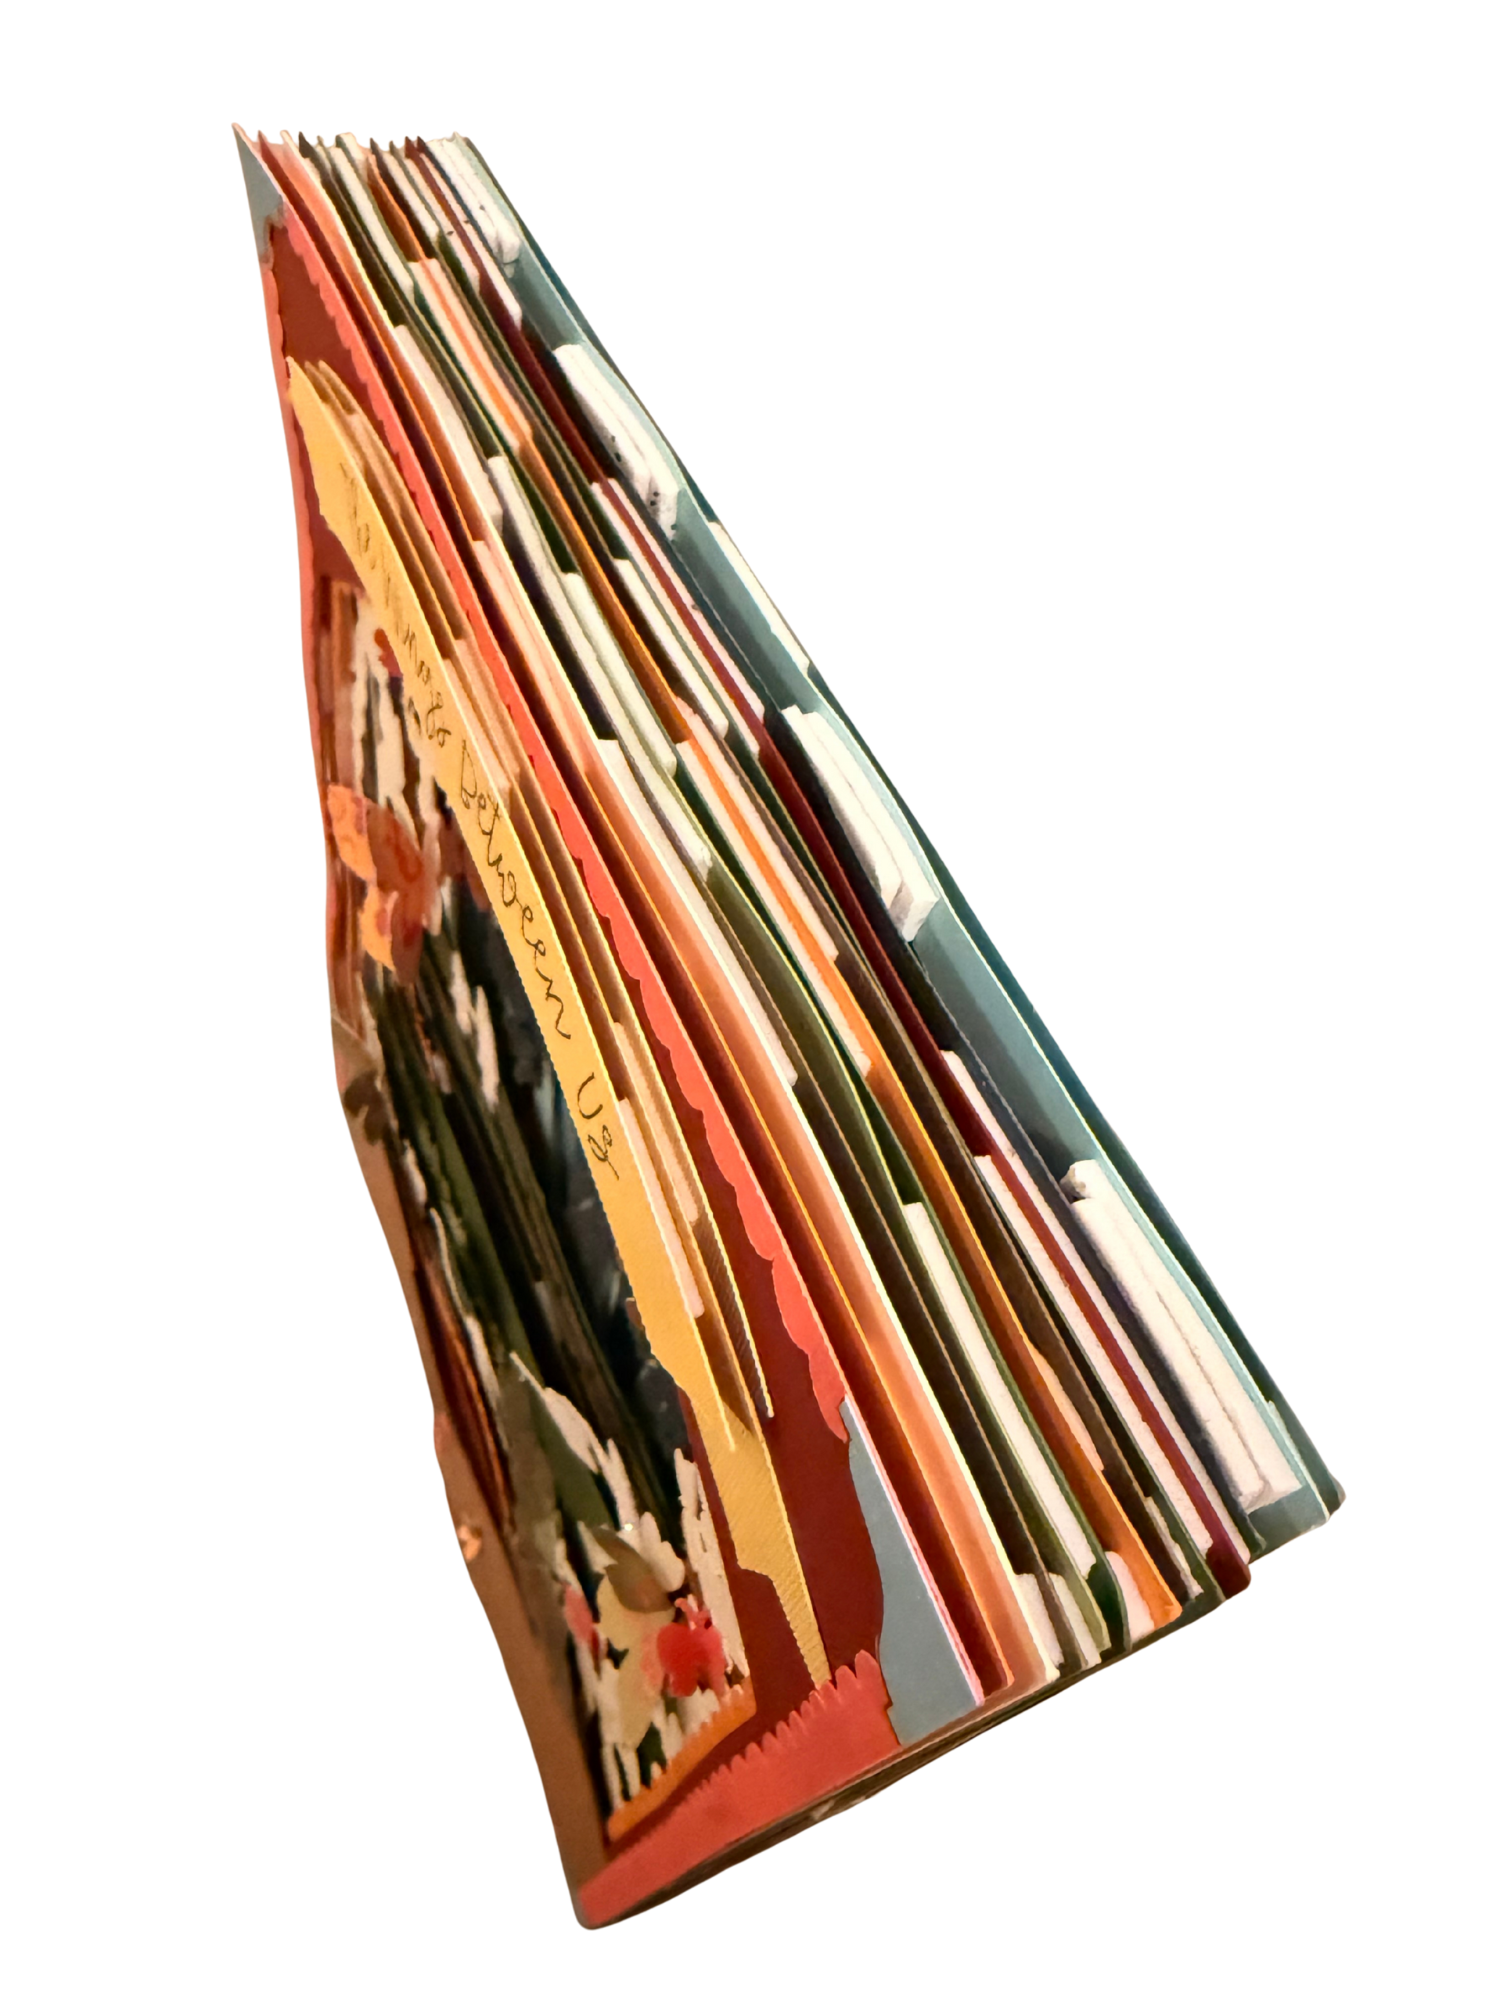
In order to create intricate cut files that I knew I would not be able to produce by using an exacto knife and cutting by hand, I illustrated all layers in Procreate and exported each layer as its own SVG file that I vectorized in Adobe Illustrator and then uploaded into Cricut Design Space where I could size it to fit onto 8.5”x11” sheets of cardstock to cut. My initial design was horizontal in format, but did not allow for enough space for the entire story to develop, so I changed the ratio to a vertical one midway through the illustration process and continued illustrating all 24 layers until completion.
Using Cricut Design Space to Cut the File and then build by hand.
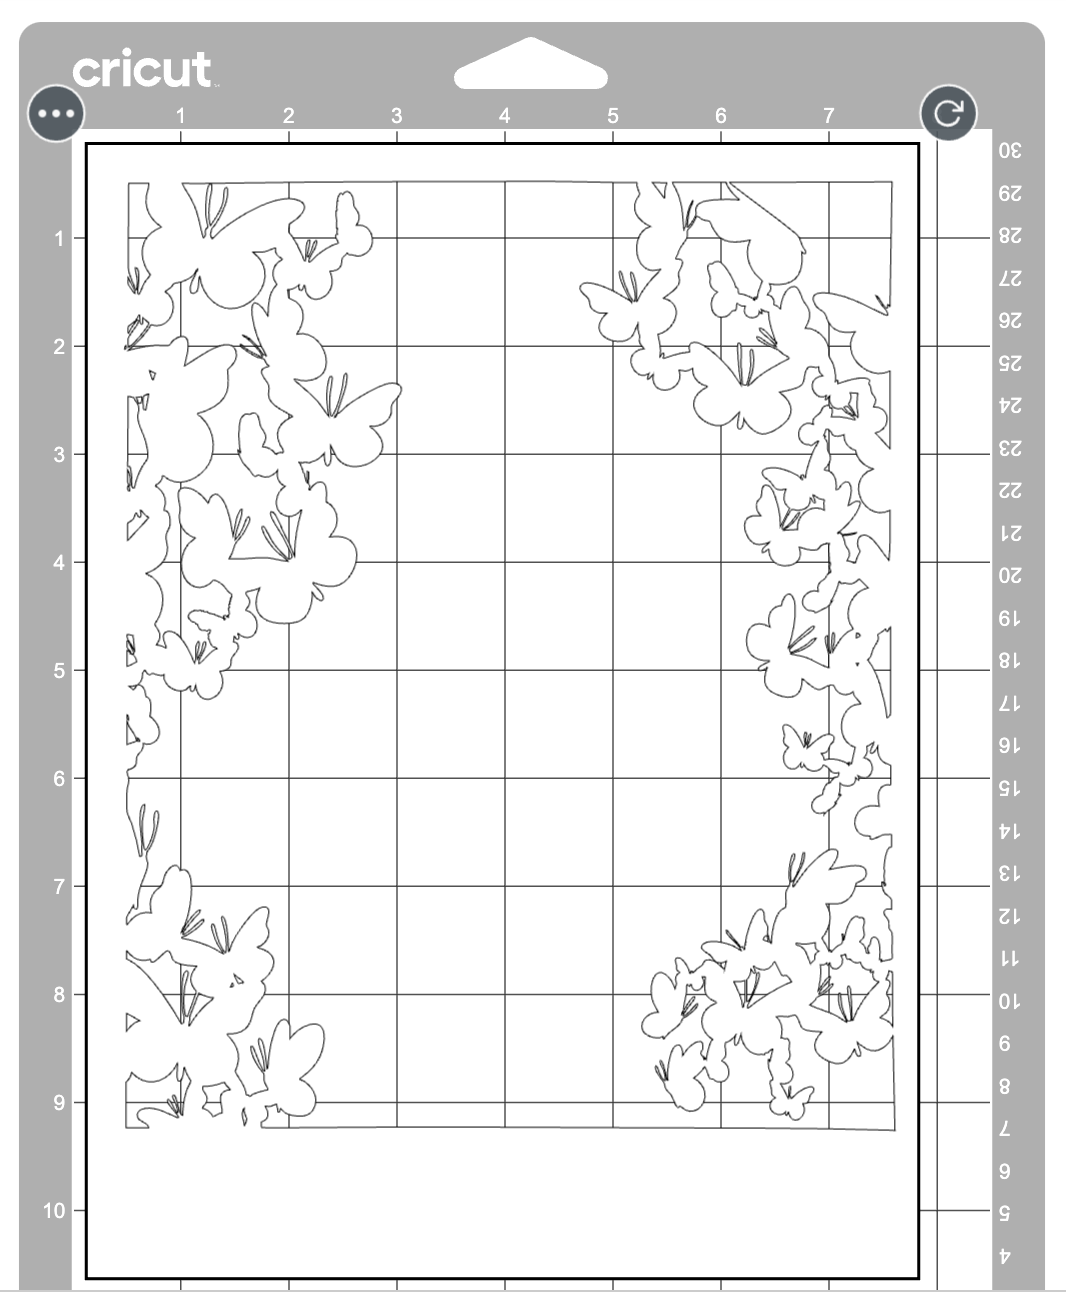
Once each layer was uploaded into Cricut Design Space and I had all of my necessary papers collected, I formatted the files to fit on the papers and began sending them one by one to cut out as well as the banner piece with the title written on by the pen that came with the Cricut Joy Xtra. The following images are what the file looked like on the screen as well as its preview for cutting on the mat. Once cut, I carefully layered each sheet of paper with 1-2 levels of adhesive foam in between to create the amount of depth that I desired in order to give the story more dimension. Once all of the base layers were completely attached to one another, I utilized found scrapbooking materials, glitter, hole punched butterflies, and more. To finish the piece, I covered all the unfinished foam edges with more cardstock and then created an envelope to enclose the entire shadowbox.
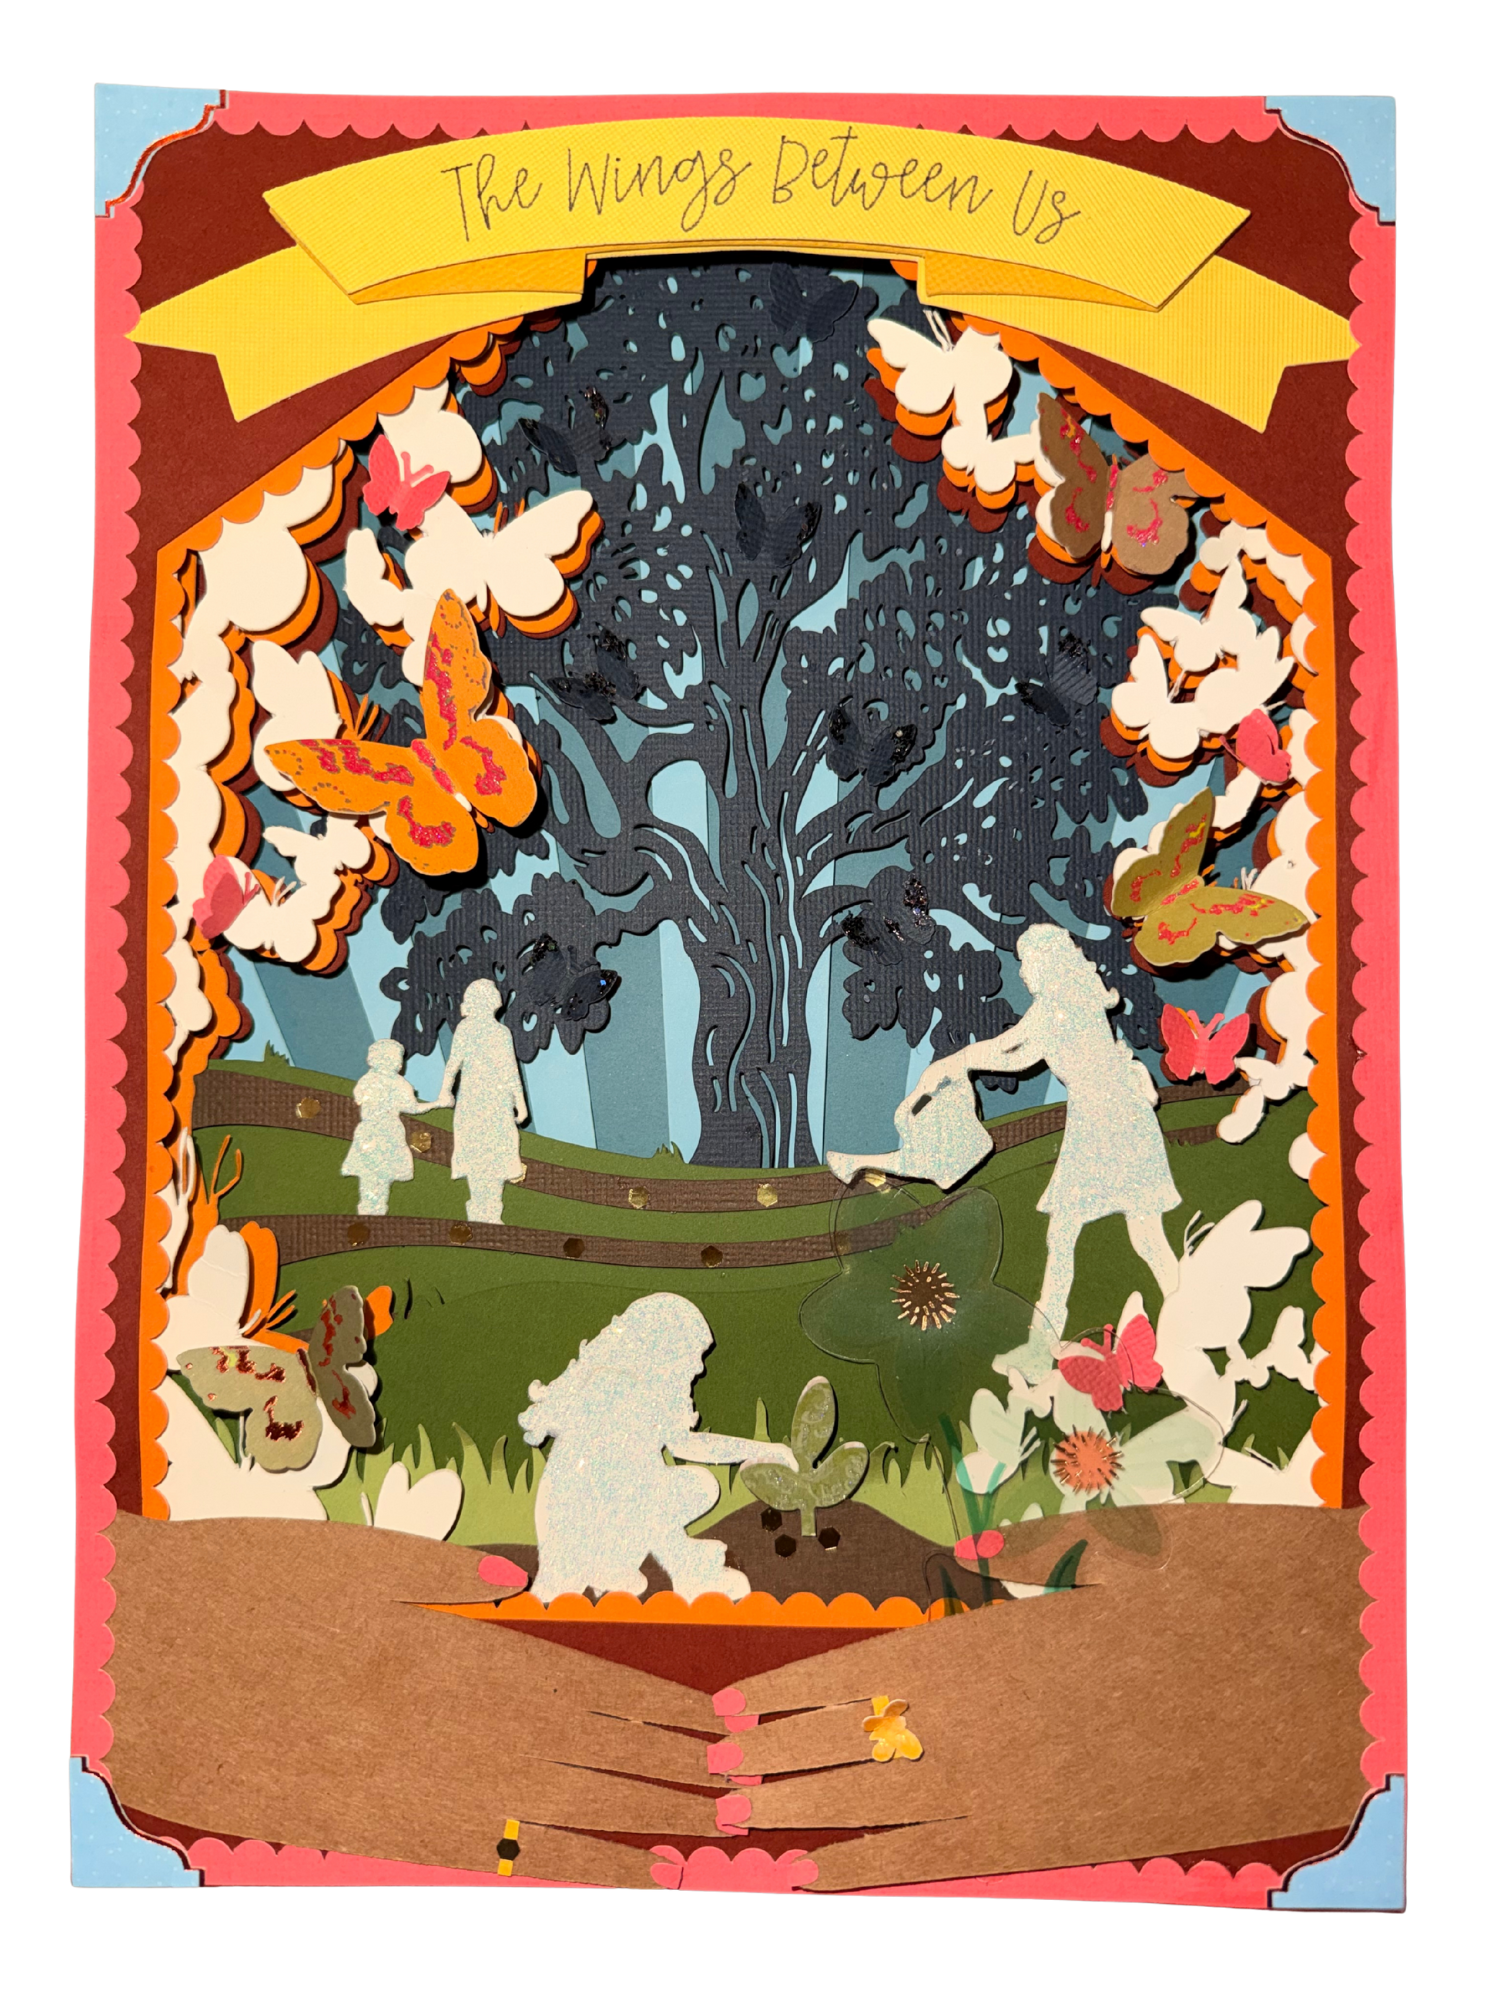
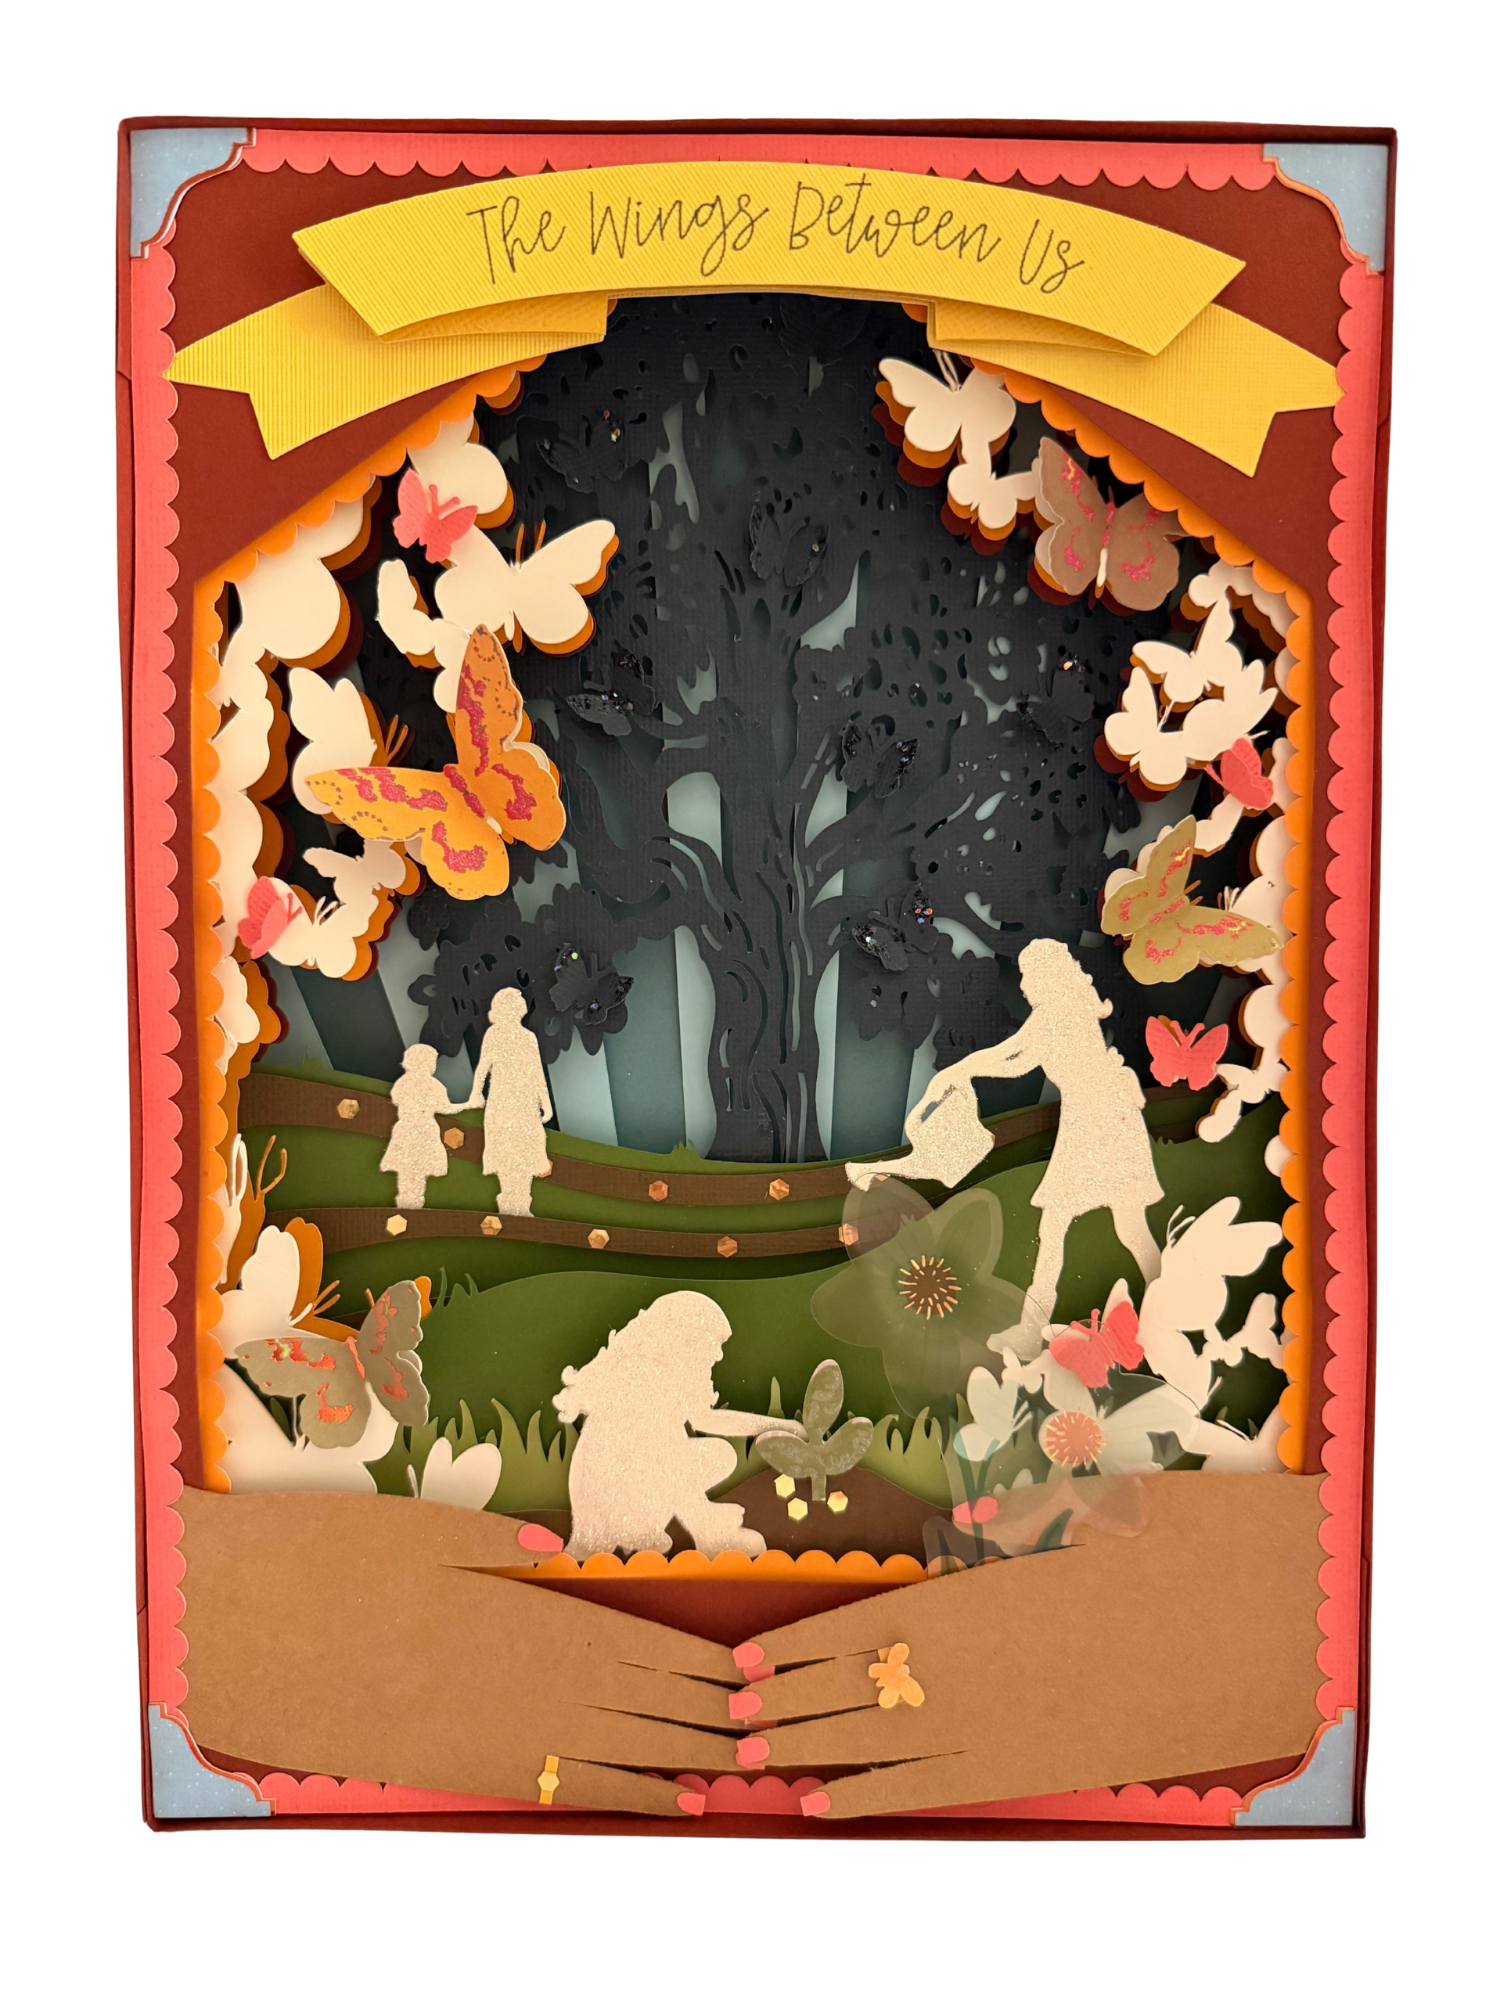
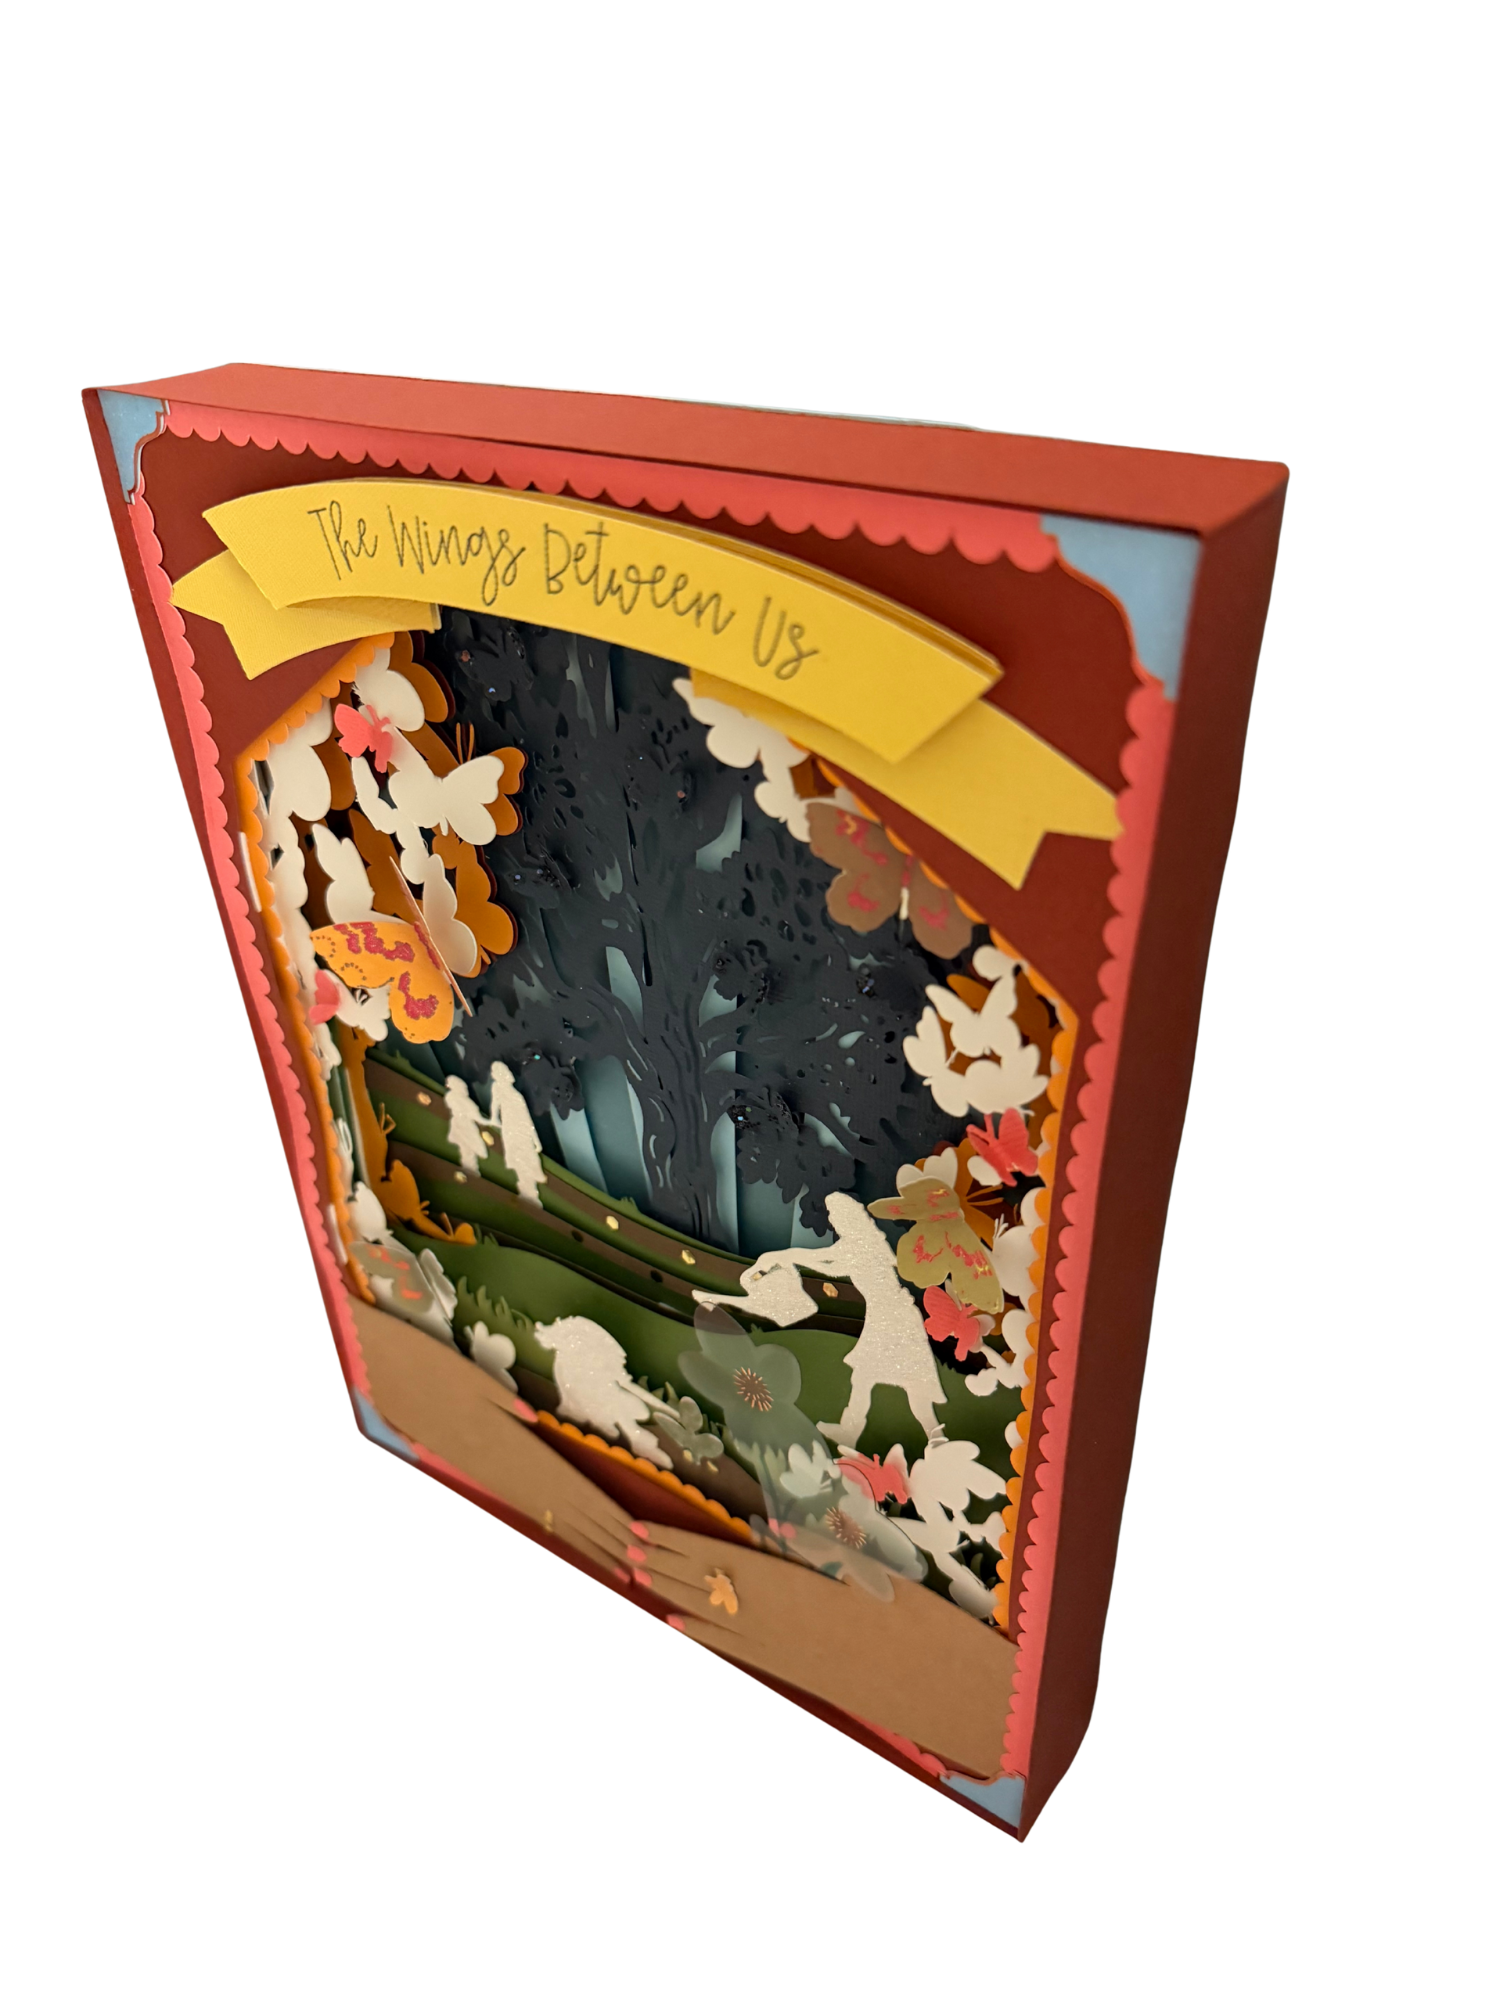

The Final Piece